
“Dairy Every Day is a Healthy Way – Keeping Kids’ Health on Track” is the theme of the 55th Annual Butter Sculpture at the New York State Fair, press materials
NYS Fair: Eat dairy daily says butter sculpture


I’m putting this article together mostly for other sports photographers working for Pro Hockey News. I’m not an expert, and I’m not a professional, but my approach is professional (for the most part). I’m often asked about how I do things, or what equipment I use, and although I’m sure there’s probably other sports photographers that have better equipment and better technique, I thought I would write down my approach to shooting sports and specifically, hockey.
With equipment, where do I begin? It’s difficult because although I have a lot of stuff, I didn’t get it all at once, and none of it was bought brand new and for full price. Everything I own was carefully purchased on the second hand market, primarily on Ebay, but also with other sources.
After lugging around multiple bags, I finally got a Pelican case. These are hard-cases that are sturdy, somewhat weather proof, and they hold a lot if you pack well. Plus, it has wheels. I bought the Pelican 1560 case on Ebay for about half price. And even at that price, it was still expensive, but worth it.

As you can see in this photo I took with my cell phone, in the dark, I have four Canon camera bodies crammed in. Two have lenses attached. One lens is a Canon 70-200mm f/2.8, and the other is a Canon 16-35mm f/2.8. There’s a Canon 430EX II Speedlite. There are several Pocket Wizard remote triggers and assorted cables. And of course, there are spare batteries and assorted small tools.
Note that there’s nothing special about these cameras. The two that I carry around are Canon 7D Mark II models. The remotes are Canon 7Ds.
Although the Pelican case rolls reasonably well on indoor smooth flooring, I prefer avoiding relying on it’s wheels when going from the back of my car up to the arena. So I bought a foldable cart to carry the case and other items.

I usually have a Sigma 120-300mm f/2.8 lens with me at games, and if I use it, I have a monopod that I attach to the lens to support it and the camera.
Since I can’t be in multiple places at once, but I like getting photos from different angles, I set up remote cameras in the arena. I usually show up three hours (more if it’s an NHL arena) prior to the game, and do my setup.
I like to sync the time on my cameras so that after the game, the photos are in order by when they were taken, and so even if a shot is done by more than one camera and different vantage points, they appear close to each other in the series of photos.
To sync, I always pull up a clock app on my phone and take a shot of the clock with each camera. In my post processing, I can use that image as a reference to adjust the date/time on photos from each camera. I’ll explain more on that later.
I equip my remote cameras with a Pocket Wizard PlusX. I make sure all of my triggers are set to the same channel so when my master (on my handheld) camera fires, the remotes also fire.
One camera is setup on a railing in an area near where media, off-ice officials, and broadcasters are situated. So the camera is reasonably safe from being pilfered with.
This camera is set up with an old manual focus Canon FD 200mm lens It’s great glass, but since I always prefocus my remotes on their target (the opposing team’s goalie area), I wouldn’t need automatic focus anyway.
I mount the camera using a Manfrotto Magic Arm and clamp.

If this were an area with more people below, I would also attach a safety cable to the camera and the Magic Arm.
The second remote camera goes up in the catwalk on a platform that shoots directly down on the goalie’s area, with a great overhead view.
I usually have a remote camera set up above the visitor’s goal.
As you can see, a safety cable is used here. It is attached to the camera with little metal i-rings that I bought off Ebay, and I have them attached to most of my cameras.
Other than the location and the safety cable, the setup is the same, and the Pocket Wizard trigger is the same as with the first remote camera.
I’ve recently bought “pre-trigger” cables for these two setups. This isn’t absolutely necessary, but without them, both cameras will sleep during times of non-use during a game. And then when I remotely trigger them, there’s a slight delay. WIth the pre-trigger cable, both cameras are sent a signal from the Pocket Wizard that keeps the cameras awake. This makes their reaction to my triggering them during a game, to be almost instantaneous. The down-side is that it runs the battery in the cameras down faster. So I always make sure I have fresh batteries before every game.
Both remote cameras are manually focused ahead of time. This works much better than relying on auto focus, which can sometimes get confused on what to focus on (plus, the auto focus causes another slight delay). Every photographer that I know that uses these triggers, manually focuses their remote cameras.
The camera that I use most during games is the one equipped with the 70-200mm lens. I have a Pocket Wizard set to “transmit only”, mounted on the hot shoe. This trigger is a Pocket Wizard Plus IV, which has a lower profile from the other triggers, but it works the same. The only reason for the lower profile is that it doesn’t interfere with my hat when I’m shooting.

Note the gaffers tape on top of the trigger. The trigger has another hot shoe on top of it, and I don’t like it snagging on my hat, so I cover it with tape.
During games, when I focus on the goalie from somewhere on the glass to the side of the goalie, the remote cameras also fire. So even if I have a player or ref in my way sometimes, the other two cameras have a good chance of getting the shot.
After the game, I will probably have a lot of throwaways from the remotes, but you never know when there’ll be that great action there at the goal, and it’s great to get it from different angles all at the same time.
Back home, I pull the photos from each card onto my computer, and I use Photo Mechanic on them. The first thing I do is sort by camera serial number. I then set the time correctly based on that first image I took of the clock app on my phone. With the correct time set, I select the rest of the photos taken with that particular camera. Photo Mechanic uses the adjustment from what it made on the clock image, and applies it to the photos I selected.
I then do this same procedure for the three other cameras I use at games.
Once the time is set properly on all of the photos, I sort by capture time, and then set the meta data I want, which typically includes copyright information, GPS coordinates (from a map in Photo Mechanic) and keywords to be included in the EXIF information on all of the photos.
I can then use Photo Mechanic to cull photos I don’t want. I can also set other keywords on various images. Photo Mechanic also has a “code replacement” feature where I can enter different codes and it will expand them in the Capture of a photo, so tell what player, what team and what jersey number is in the shot. It’s a handy feature.
Once I have all the photos tagged and culled, etc, I rename them using Photo Mechanic. The photos are renamed with a datetime based on the time each image was taken. I then use Photo Mechanic to copy the photos to their final destination on my external hard drive.
Lightroom is then used to import the photos, read the metadata from the sidecar files. Before doing any processing, I actually go to the trouble of using Lenstagger (a plug-in) to inject the correct information about the manual lens, so that the photos taken with it have EXIF information that actually reflects that they were shot with that FD 200mm old-fashioned lens. This step isn’t necessary, but I think it’s a nice touch.
I do my Lightroom adjusting, including noise reduction, and apply this to the entire set of photos. I then go through and crop and straighten the shots. I can then render jpg files to send out at that point.
I should also mention that while I’m doing all this post processing, I have batteries being recharged and making sure I’ve tested the AA batteries that go in each trigger, so I’ll be ready for the next game.
As you can tell from all of this, the equipment isn’t as important as the steps. Some people might not do everything I do. And to be honest, if I’m on deadlines and got a series of games (such as with a tournament), I might not do everything that I normally do. The key is that whatever you do, you have to be prepared. Make sure you have plenty of fresh batteries (for the cameras and the remote triggers). Show up ahead of time so that you’re not rushed, and you can go through your setups and test everything to make sure you haven’t forgotten something. That really is the key; being prepared and not being rushed.
In the end, there’s no magic. The equipment isn’t top of the line (I wish it was). It’s photographic technique and a few gadgets, and lots of preparation. And I didn’t do this all at once. I built on it a little at a time, and that got me where I am today. Anyone can do it.
Contact Les: Les.Stockton@prohockeynews.com
Editor’s Note: Les Stockton is a long-time photographer for Pro Hockey News. He is the staff photographer for the Tulsa Oilers of the ECHL, and has covered numerous events for PHN across several leagues, including at the NHL level. In his time away from hockey he covers several other sports, including indoor football, Semi-pro football, rugby, roller derby and dirt track racing, to name a few.
If you would like to join Pro Hockey News as a writer or photographer, stop by our recruitment page by clicking here.

A new photography in studio is helping women look and feel their best. Boudoir by Nicole was welcomed to the Logan County Chamber of Commerce with a ribbon-cutting ceremony Tuesday and will celebrate its grand opening on Monday, Aug. 28.
Located at 621 W. Main St., the studio is owned by Nicole Capps, who does everything from family and couple photoshoots to senior photos. Her favorite kind of photography, though, is boudoir.
“We’re a fully styled glamourous studio. So, we provide hair, makeup, shoes, jewelry, beautiful products, should you choose to want any,” Capps.
Capps’ goal with the studio is to help women see the best in themselves.
“We just empower women and we believe in women, trying to make our little footprint in the world to help women knock those insecurities that baffle us every single day of feeling worthy or beautiful. We get to do it and we get to change lives, it’s amazing!” she said.
Capps will also be opening up her studio to other photographers who are looking for a space to shoot for a small half hour and hourly rates. Plus, she will have predesigned holiday theme sets available and ready to use.
To book a photoshoot, contact Capps at 970-572-9624, email info@boudoirbynicole.com, or visit her website, https://ncappsphotography.mypixieset.com/.
The studio will be hosting a grand opening event Monday from 5 to 7 p.m. The first five people to enter the doors will get a special promo and everyone is invited to enter to win one of the many door prizes.

Having the right image editing and photography skills can make a world of difference in the real estate industry. Clear, vibrant photos not only optimally display a property’s characteristics but can captivate potential buyers in no time. Whether you’re a seasoned realtor or a newcomer to the field, mastering these visual techniques is instrumental to your selling success.

From using natural lighting for a warm ambiance to post-editing tweaks that draw attention to the home, these tried and tested tips will elevate your real estate photography game ASAP.
Diving into the world of real estate necessitates a firm grip on your camera settings. You should familiarize yourself with aperture, white balance, ISO settings, and more. Using the right settings can enhance the quality of your photos, capturing property details in their true essence.
Natural lighting has the ability to accentuate room features in ways artificial light often can’t. Strive to time your shoots during peak daylight hours. This helps create an inviting, warm atmosphere in the property photos, appealing strongly to prospective buyers or tenants.
Never underestimate the power of easy background editing. Efficient use of editing software like Picsart can transform an ordinary photo into a stunning shot. From replacing gloomy skies to removing unwanted objects, background editing is instrumental in creating an appealing image.
Stability can greatly influence the quality of your photos. Using a tripod can mitigate hazards of unclear shots due to shaky hands or movement while capturing. This simple tool can ensure sharper, clearer images that paint an accurate and enticing picture of any property.
As a real estate professional, it’s essential to embrace wide-angle shots. They can create a sense of spaciousness and depth, capturing the full essence of a property. But it’s crucial not to overdo it. Focused shots devoid of distortion will create an accurate perception of a property.
In the realm of real estate photography, understanding and playing with composition can be a game-changer. Exploring perspectives like floor-level or bird-eye views can add an element of intrigue to your shots. With composition, you’ll combine creativity with property detailing.
Without a doubt, focusing on key features is critical in capturing a building. Unique elements such as an expansive view, detailed architecture, or a stylish interior deserve to be emphasized. Highlighting these aspects can increase a property’s appeal and attract more potential buyers.
Artificial lighting is a tool best used intelligently in photography. For poorly lit spaces, don’t hesitate to use flashes or LED lights. They can help maintain the color integrity and detail within your photos. A perfectly lit photograph showcases a property in its best possible light.
Clarity should be a top priority in real estate photography. High-resolution images with sharp, clear details leave a lasting impression on home buyers. From the brightness of room lights to the texture of a wood floor, vivid and crisp photographs allow buyers to appreciate your property.
Post-editing is a significant phase of photography in general. It’s essential to be detail-oriented during this process, as brightness adjustments and color correction can greatly amplify your images’ appeal. A professionally edited photo catches the eye more than an unedited one.
Effective real estate photography goes beyond point-and-shoot. It’s an art, blending the right techniques with a keen eye for detail. Implement these image editing and photography tips into your routine, and watch how your realty business transforms and grows almost effortlessly.

… whilst on a walk a few years ago during the golden hours of early evening I looked up at an empty lot near home and thought I saw as person laboring in the brush and overgrown weeds that covered the property … and then I looked a little more closely and saw that it was just a bent over yucca tree awaiting its final disposition, which was years in the making … or perhaps it is a very old soul contemplating all that was, that which is and that yet to come. Do we really know?
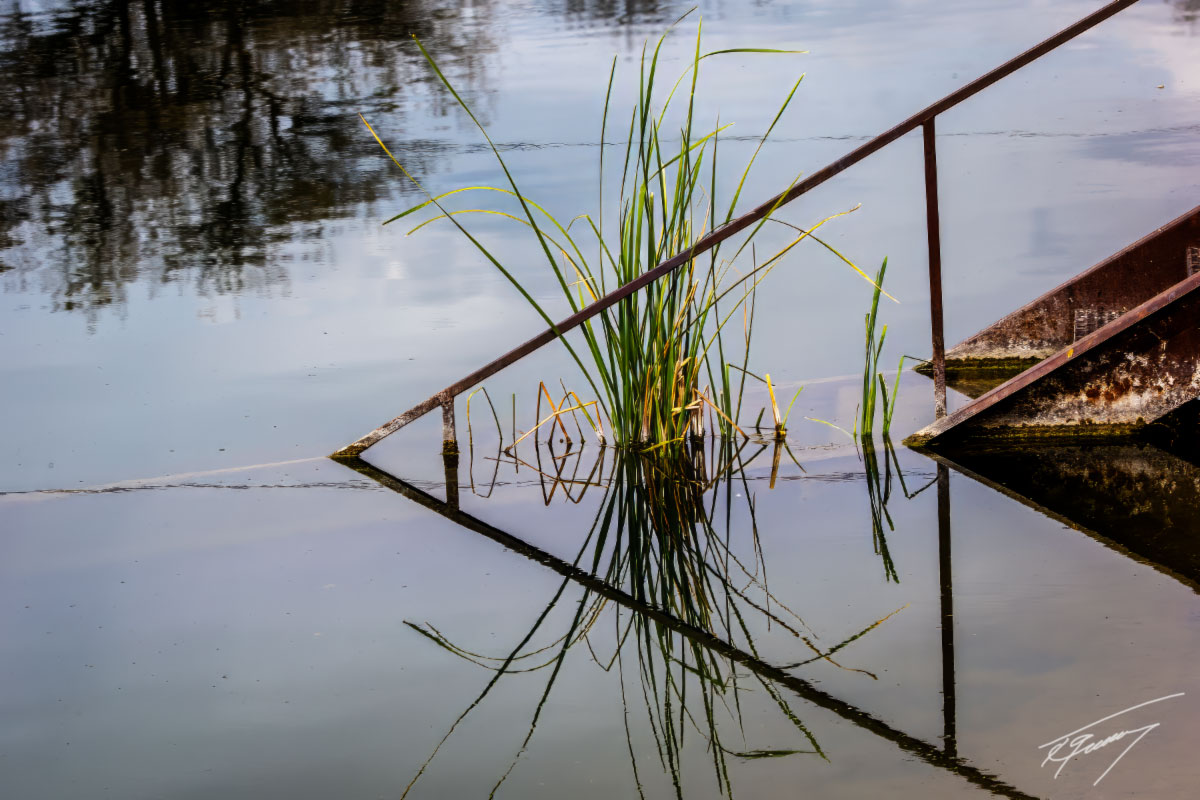
Below is a shot from Bubbling Ponds Fish hatchery in Page Springs … the water was quiet, and the reflections created near perfect symmetry. I like it and all was well with thousands of fish in the pond … herons, hawks, eagles and otters all waiting their turn to take from the abundance beneath the surface … the drama and saga of life on earth.

Over the weekend I got continual updates from the Weather Channel and other sources about what they called a historical storm … on the edge predicting doom and gloom as they reached fever pitch with warnings of epic and historical flooding headed towards California and the southwest in general … my Weather Channel app constantly carried news that historic flooding, loss of property and life was on the way.
From the time that I was a kid and we got our first television circa 1950, I have watched the weather made “historic” with cameras put down in the gutter to make an ordinary rainfall runoff look epic! On top of that we have everything being blamed on manmade climate change and we are told that we are destroying the planet.
A favorite “historic” and true stories is of when Leeland Stanford was inaugurated as the eighth governor of the State of California in January of 1862, he had to take a rowboat to the capitol to be sworn in because the city of Sacramento was underwater with true epic flooding and the central valley was a huge inland sea. In addition to northern California the storms affected the whole west coast and into Idaho, Utah, Arizona, New Mexico and Mexico … not only that, but this type of storm is not unusual and occurs ever hundred to two hundred years. Four thousand people in California died which was one percent of the population of California … an equivalent number today would be 395,000 people. The automobile had not yet been invented and we were just entering the industrial revolution. The Great Flood of 1862. A must read to gain perspective.
Leeland Stanford was also a very powerful force in California and the USA, It is a very fascinating story. He and his wife established Stanford University in memory of their late son Leeland Stanford Jr with an initial endowment of what today would be a gift in excess of a billion dollars.
I hope you will take the time to read these Wikipedia articles as they are well worth your time. They are factual and not hysterical as we see so frequently today.
First iteration of the Pepperdine presentation will be done by the weekend and then the final editing and tweaking until I give it on the 22nd of September.
I will be the featured artist at the Sedona Renegades Group in their gallery at the Hozho Center, 431 SR 179 Suite 6 in the heart of the gallery district in Sedona. A meet the artist will be held on Friday, September 1st beginning at 5PM … hope to see you there.
Have a beautiful day … smile and live life with gusto … only you can make that choice!
Cheers,

Ted
A bird flies through the sky, and I fly with it. I am in
each pearl of moisture sparkling in the sun. I lie lazy
on the clouds. And I acknowledge my kinship with
each winged thing.
I see all as one, and nothing repels me, as this new
day climbs noiselessly out of the valley of night.
Peace lies over the world and over the world of my soul.
excerpt from On a May Morning by Max Ehrmann
###
 The easiest way to reach Mr. Grussing is by email: ted@tedgrussing.com
In addition to sales of photographs already taken Ted does special shoots for patrons on request and also does air-to-air photography for those who want photographs of their airplanes in flight. All special photographic sessions are billed on an hourly basis.
Ted also does one-on-one workshops for those interested in learning the techniques he uses. By special arrangement Ted will do one-on-one aerial photography workshops which will include actual photo sessions in the air.
More about Ted Grussing …

This is an advertisement

Federal money for arts, culture and educational programs will fund the creation of two dugout canoes in Southeast Alaska.
Goldbelt Heritage Foundation, the nonprofit arm of Goldbelt, Inc., will teach Alaska Native youth how to carve canoes with nearly a quarter million dollars in grant funding from the National Park Service. The goal is to teach Tlingit culture while applying the principles of science, technology, engineering and math education to canoe making.
The National Park Service awarded the grant of $243,457 to Goldbelt Heritage Foundation on Aug. 15.
Desiree Jackson, Goldbelt Heritage Foundation executive director, said the four-year grant will be the start of a continuing education program that will uphold canoe stories behind the traditional use of the canoe.
“We want to grow this momentum around youth paddling and utilization of the yaak’w (canoe) because this is another sport and activity youth should be engaged with,” she said.
Goldbelt Heritage Foundation will create courses around the building of dugout canoes.
“There is so much undocumented curriculum around navigation,” she said. “How did we use the stars? How did we use waypoints?
The program is called “Daak Yaylatsaak,” which means “push the boat out” in the Tlingít language. Jackson said the goal is for the program to be run through classrooms in Southeast Alaska during school, which she said is important for Alaska students as part of place-based education.
The group aims to host a regional youth canoe gathering within the next few years.
The money is part of the first round of awards for the Native Hawaiian and Alaska Native Culture and Arts Development grant program. The National Park Service administers the grant on behalf of the Secretary of Interior, Deb Haaland, using funds appropriated by Congress.
National Park Service Director Director Chuck Sams said the project will provide educational programming while it continues traditional practices for youth in Southeast Alaska.
“The National Park Service is committed to supporting Native Hawaiian and Alaska Native culture and art programs, including traditional and contemporary expressions of language, history, visual and performing arts, and crafts,” said Sams.
The National Park Service awards the grants for scholarly study and instruction of contemporary arts and culture, to establish educational programs that lead to degrees in Alaska Native and Native Hawaiian art and culture programs or to develop arts in the community. Private, nonprofit groups that primarily serve Native Hawaiian or Alaska Native communities and are recognized by the governor of Hawaii or Alaska are eligible.
Alaska Beacon is part of States Newsroom, a network of news bureaus supported by grants and a coalition of donors as a 501c(3) public charity. Alaska Beacon maintains editorial independence. Contact Editor Andrew Kitchenman for questions: info@alaskabeacon.com. Follow Alaska Beacon on Facebook and Twitter.

“My identity as a queer artist and my passion for visual storytelling fuel my dedication to capturing these emotions in my work,” says photographer Daniel Blake (he/him/his) to the Phoblographer in an interview. “It’s about showcasing the beauty of vulnerability and the complexities of the human spirit. Being able to evoke emotions and create that bond with my audience is what drives me as an artist.” Dan continues to state that he’s sharing a part of his soul and inviting others to join him on an emotional journey. This idea permeates through his surreal photography.
All images by Daniel Blake. Used with permission. Please visit Dan’s website, Flickr and Instagram.
For Daniel, photography has always been a way for him to express himself when words fail him — and several other artists and photographers can relate. In the way that many readers were beguiled by the words and skill of Shakespeare, it’s easy to become smitten with his conceptual and surreal photography. And for Daniel, it’s always been about expression — specifically around the emotions that he’s feeling.
“Over the last few years, my focus has been on exploring deep emotional themes that resonate with me: heartache, loneliness, love, and melancholy,” he tells us. Daniel’s journey as a queer photographer has shaped his photographic style. It shows a unique perspective that it hard to see or find amongst many photographers.
I’ve been particularly fascinated by the way memory fluctuates and influences our realities. It’s incredible how our minds can warp our perceptions, sometimes in ways we adore, and other times, we despise. This aspect adds a profound layer to my work, inviting viewers to ponder their own memories and emotions.
Daniel Blake
Dan started out around 2009 — when Tumblr was all the rage. A self-described shy kid, he took a lot of self-portraits. Sometimes his father would help him realize his creative dreams, but otherwise, his work was often created alone. Dan drew inspiration from the surreal artwork on Flickr, which is where we found him.
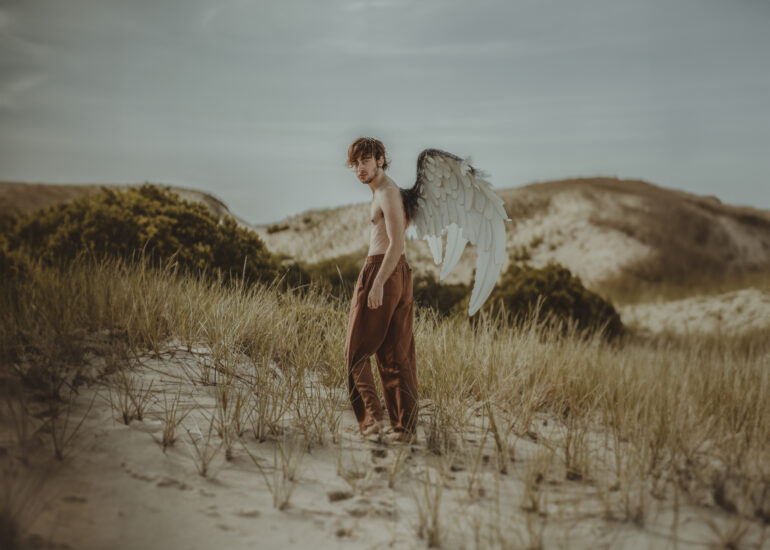

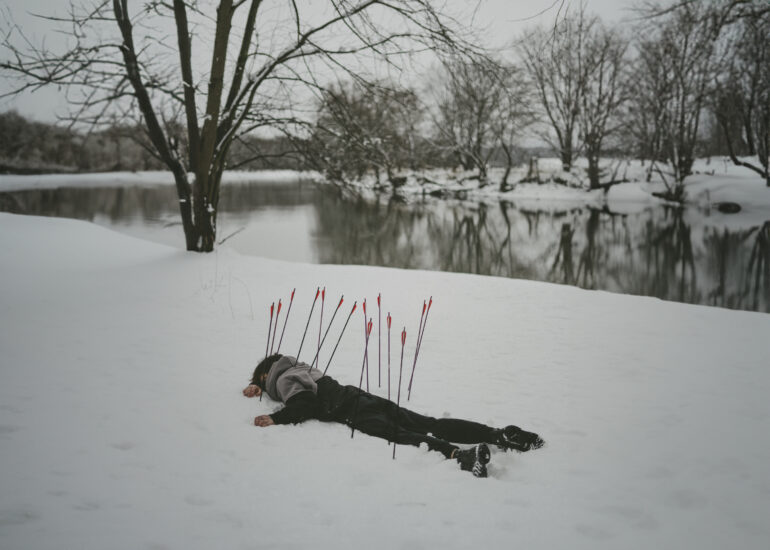

Dan wanted to be a photographer from a young age, but thought that it was an unattainable dream — and he didn’t want to specialize in wedding photography. But as Dan continued to explore emotionally charged themes in his work, he started using it as his primary way to communicate his sense of isolation and vulnerability.
“During high school, I pursued photography courses and even volunteered for a photojournalism program in my senior year,” he tells us. “Around the same time, I was diagnosed with severe panic disorder, which further influenced and deepened the emotional aspect of my art.” From there, he went to community college, took a break while exploring his identity, and then returned to college, focusing on graphic design. But photography was always the main squeeze.
Dan’s embers for photography sparked into flames when he discovered drag culture via his partner at the time. Specifically, it renewed his passion for nightlife photography. “Every weekend, I ventured out alone, documenting moments with my camera,” he tells us. “Although I sometimes collaborated with others for self-portraits, I predominantly captured them on my own still. Surprisingly, I even took the stage, performing in several drag shows and later hosting them through my small project, the Grand Artists Guild (G.A.G.).”
For the money, he assisted a wedding photographer until upgrading his equipment to a Sony a7 III and a few lenses. This eventually led the way to him booking his own weddings until he registered as a legitimate photography business this year in 2023. To help clarify that statement, we mean that he’s gainfully employed this way.
My journey has been one of growth, resilience, and pursuing my passion relentlessly. Through photography, I have found a way to connect with others, express myself, and create lasting memories for my clients. It’s an honor to now be a part of the photography industry and contribute my unique perspective and artistic flair.
Formerly a Canon and Nikon shooter, Dan felt that his gear couldn’t keep up with his creative vision. So he got a Sony a6000 until upgrading to the a7 III. “When I hold and use this camera, it evokes the nostalgic charm of traditional film cameras, which I absolutely adore,” he tells us. “Although I’m not particularly drawn to the process of film photography, the Sony a7 iii captures the essence and style I love.” He pairs the camera with 85mm, 50mm, 24-70mm, 30mm, and 14mm lenses. He also always has an ND filter.
Dan does a combination of in-camera work and Photoshop. In fact, he admits that he used to struggle with Photoshop, but now he’s more comfortable with it. He used to do most of his work in the program, actually, until he realized that it’s sometimes faster to just get things done in-camera. “…I believe both approaches hold significance, but I find myself enjoying the editing process immensely, and it remains a significant aspect of my work.”
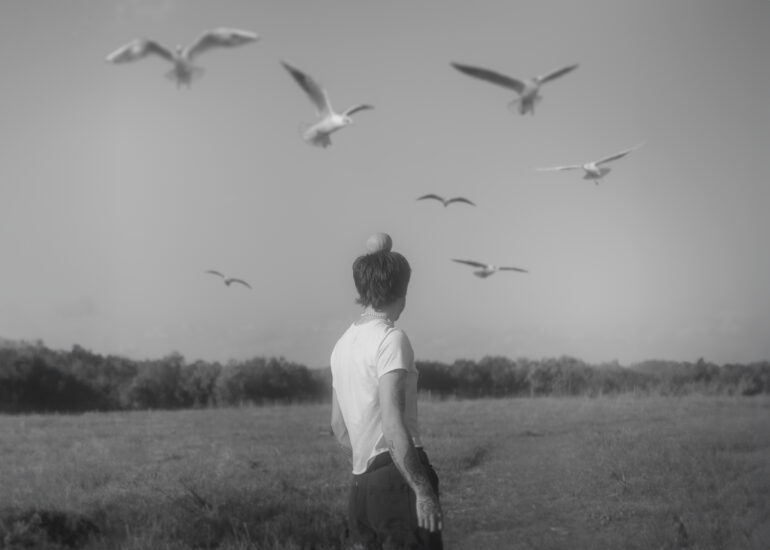


Sure, Dan does a lot of work in Photoshop, but he’s also a bit skeptical about AI. When he started seeing the TikTok trends, he thought it would fade away. But it didn’t. “On one hand, I recognize the potential of AI as a powerful tool that can significantly improve workflow, helping with tasks like object editing, clothing fixes, and adding elements not readily available,” he shares. “Art, being subjective, can benefit from AI’s enhancements. Yet, I also notice some individuals using it for their headshots and other purposes, which raises a sense of uncertainty.” Dan hopes that AI serves as an aid in the future to enhance artistry rather than replace it.


Depending on how you want to look at it, the Columbia Museum of Art’s exhibition Resurgence
and Renaissance: Art of the Catawba Nation Since 1973 could be thought of as a few
years, 50 years or a few millennia in the making.
Stroll through the exhibition space for just a few minutes, though, and one thing
is clear: The attention that Catawba artists are getting is overdue.
A collaboration between USC Lancaster’s Native American Studies Center and the CMA,
the exhibition, which runs until Sept. 3, features 82 items — primarily pottery but
also quilts, hats, baskets and photos of some of the Catawba potters.
All of the pieces on view are from the collections of the Native American Studies
Center, which was established in 2012 for the study of South Carolina’s Native American
peoples, their histories and their cultures. The center features archaeology, language,
and folklore and oral history labs; primary and secondary texts on Native Americans
in the Southeast; classes and programs for both students and the public; and, perhaps
most notably, the largest collection of Catawba pottery in existence.

But to understand today’s exhibition, one must first look back several decades more,
at least. This year marks the 50th anniversary of the museum’s first Catawba pottery
exhibition, in 1973. It was organized by a USC Columbia graduate student, Steve Baker,
who recognized the pottery as a traditional art form.
Stephen Criswell, director of Native American studies, professor of English and folklorist
at USC Lancaster, discussed the impact of the 1973 exhibition at a recent lunch and
learn conducted by the NASC.
“It was the first time that outsiders began to see Catawba pottery as art, and collectors
began to see it as art,” Criswell said. “And the price of the pottery reflected that,
and the reverence for the pottery began around this time. Potters had been working
for, what, 5,000, 6,000, 7,000 years making this pottery. They’d been doing this for
generations and generations, and the pottery was sold for very, very meager prices,
and often traded for goods or services.”
Catawba pottery had been exhibited at museums before, but typically at natural history
museums, “sort of exoticizing the Catawba instead of seeing this work as art,” Criswell
said. But Baker did see it as art.
This marked a monumental shift in attitudes regarding Native American skills and artistry.
Presenting the pottery as art changed people’s perceptions, and it opened up a market
for the Catawba thanks to newfound demand for their craft.
As a result, at a time when some, including Baker, were beginning to wonder how much
longer these ancient techniques would survive, production increased, helping to breathe
new life into a time-honored tradition.
As evidenced by the pieces featured at the CMA, today’s Catawba potters still use
the techniques passed down from generation to generation for some 5,000 years or more,
even while they explore their own creativity. The pottery is made from traditional
clay resources, time-honored fire methods are used, and mostly traditional forms are
still seen as well.
Their processes also carry some traits that are distinct from modern pottery making.
The elements within the clay used affect the final colors of the art, so there is
often distinct coloring that is a result of the firing process and different types
of clay. Additionally, Catawba pottery is unglazed, which affects both the creation
process and the finished product. The results are fascinating and beautiful.

Resurgence and Renaissance, however, is about more than just the pottery, and about
more than 1973. “It was important for us to let the experts and the citizens of Catawba
Nation take the lead,” says Jackie Adams, director of art and learning at the CMA.
“We wanted to center Catawba voices not just through the objects, but with the design
of the show.”
So, in addition to the works of art, elements of storytelling, folklore and language
were brought into the exhibition. Even the color of the walls — a rich blue — represents
water, specifically the Catawba River. There are also graphic elements to the show
created by Alex Osborne, a Catawba citizen, designer and featured artist. Osborne’s
work includes a large, striking image of a Catawba chief’s head and a genealogy tree
of artists and potters that goes back generations.
It all makes for a captivating, entertaining and highly educational experience that
must be seen in person to be truly appreciated. “I remember Beckee (Garris, NASC program
assistant and Catawba artist) said something: ‘People still think we walk around in
leathers and feathers,’ ” Adams says. “There are these really perpetual stereotypes
that still exist, and we need to counter those. And the show does that.”
Resurgence and Renaissance: Art of the Catawba Nation since 1973 is on display at
the Columbia Museum of Art, 1515 Main St., through Sept. 3.






