Photography

Woodland Photography at Night

Woodland Photography at Night

Woodland photography works best during foggy days. It helps to simplify the often chaotic forest environment. Soft sunlight early in the morning or late in the evening can also create a beautiful mood for your woodland photos. But what if you have neither fog nor the right light conditions? You can create those yourself, as I show in this article.

For the technique below, it has to be dark enough. You want the ambient light to reveal just a few details in the forest as a foundation for your photos. The end of blue hour in the evening or the beginning of blue hour in the morning is perfect. Then, you can produce compelling atmospheres by using a strong enough light setup. I used the Colbor CL60R combined with the Moman Power 99 battery for the photo below.

In the Field

Scouting is crucial for night photography. So, I selected a forest I knew very well for this experiment. I also arrived long before sunset to find a good composition and started planning where I wanted to set up my light later.

If you arrive early, take photos of the final scene while it’s still bright enough. Although I didn’t need those for the image above because the Colbor CL60R provided enough light, I wanted to play it safe. If the light is flat, it’s easy to darken those photos to later blend them with the night images where more detail is required using a technique called time blending.

Once you have arrived at a composition you like and taken your first photos, it’s time to plan the location of the light. I didn’t know what would look best when I began this experiment. But I found that having the light hidden behind a tree in the center of the frame results in the most dramatic atmosphere. Lighting the scene from the side causes too much chaos, and having the light source visible in the image can be distracting.

That’s why you should try to find a composition with the main subject in the center of the frame. Then you can set up the light directly behind it to create a beautiful rim light. It draws further attention to the shape of your subject, with shadows radiating out from behind.

Below is a comparison of the scene before sunset and during blue hour. You see how I turned ordinary light conditions into something magical.

All that was missing now to create the moody title photo was some post-processing.

Photo Editing

Looking through the photos from that evening for the first time, I knew I wanted to try a black-and-white conversion. Although the dark blue sky contrasted nicely with the red and orange leaves on the forest floor, the colors didn’t contribute to the atmosphere I was aiming for.

I wanted to show a scene that looked as if it was taken during the witching hour, with the trees dancing around the ethereal glow in the background.

As a first step, I did my usual raw conversion in Lightroom, mostly bringing up the shadows to reveal all detail my Canon EOS R5 had captured. The result is a relatively flat image, perfect for further editing in Photoshop.

After making the adjustments, I synchronized them to a few more photos I had taken for focus stacking. I then opened all photos as layers in Photoshop and performed the stacking through manual masking. If you want to learn more about my workflow, I recommend this article I wrote last year. I show different techniques, including manual stacking in Photoshop and automatic stacking in Helicon Focus.

After the stacking, there were two more steps. First, I performed the black-and-white conversion using a combination of a Gradient Map and Black and White adjustment layer. I show how I combined the two in the feature video. Alternatively, you can use plugins like Nik Silver Efex, which can yield great results.

Above, you can see that the black-and-white conversion alone wasn’t enough. The image on the left still looks pretty flat and lacks atmosphere. I could add further interest to the photo with a combination of “Curves,” a dodge and burn layer, and a blank layer, which I painted with different white textured brushes.

The image on the right pulls the viewer into the center of the frame. Drawing on the blank layer, I created a mist-like atmosphere around the dancing trees, making the scene look even more mystic.

Conclusion

While you can also use a torch to light-paint such a scene, using a static light allows you to produce predictable results. Mounting it on a tripod lets you create precise lighting by fine-tuning how your scene is lit. It’s similar to using a tripod for your camera, where you can make fine adjustments to your composition.

And by using a battery like the Moman Power 99, you also don’t have to rush. It was only 5 °C outside during my shoot, and I used the light for close to 30 minutes at intensities between 60 and 70%. When I packed up, the battery still had close to 80% of its capacity. I could have continued with my night photography for at least another hour.

It was definitely not my last time taking night photos with a studio light. Before that evening in the woods, I hadn’t taken many photos this year yet. The conditions so far weren’t inspiring after a year of traveling the world and the sensory overload this had created. But experimenting with the light helped ignite my creativity again.

PHOTOGRAPHY SHOW FEATURES KEYS WEEKLY CONTRIBUTOR MARK HEDDEN

PHOTOGRAPHY SHOW FEATURES KEYS WEEKLY CONTRIBUTOR MARK HEDDEN
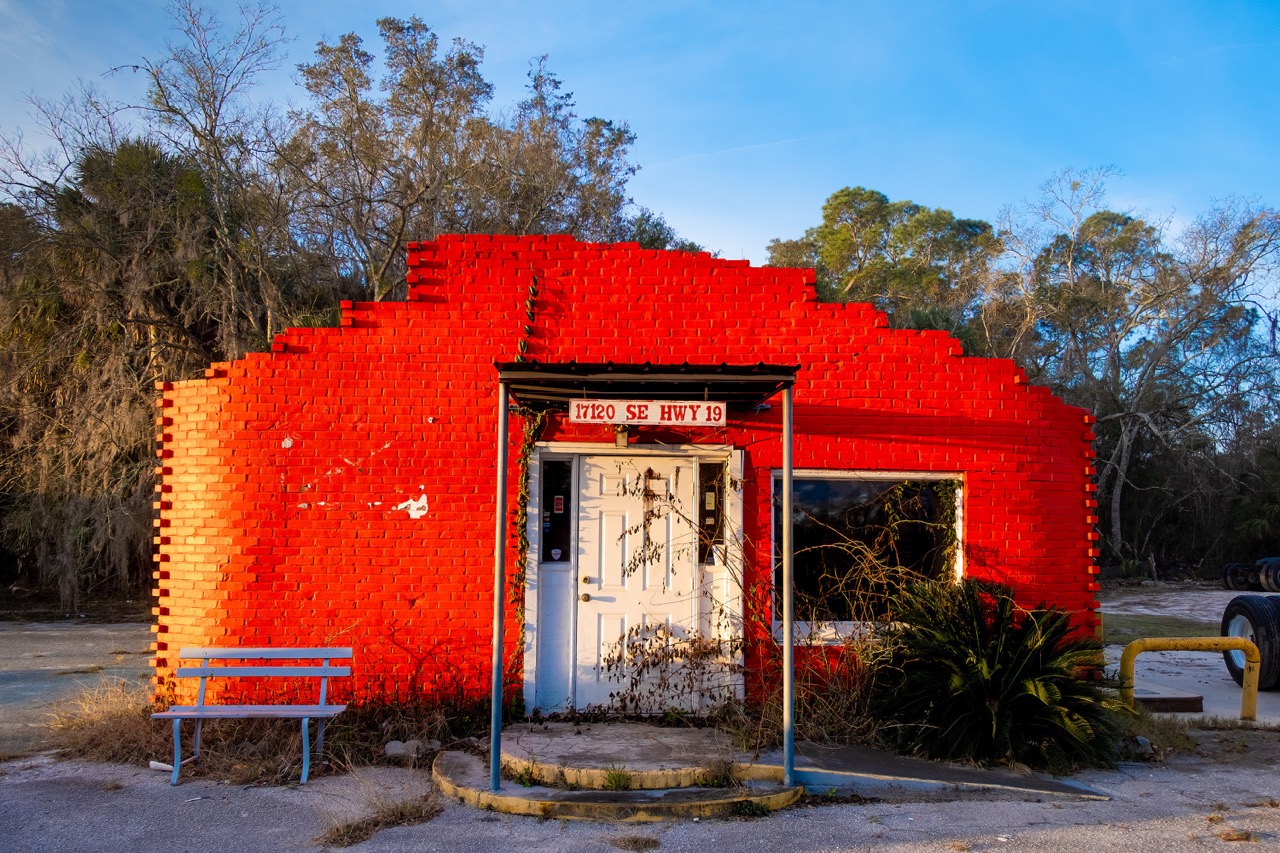
‘Highway 19 Revisited’ by Mark Hedden is part of the ‘Photo/Work’ photography show that opens May 5 at JAG Gallery and features the works of Hedden and Lynne Bentley-Kemp.

JAG Gallery, 1075 Duval St., will feature a joint art show by photographers Lynne Bentley-Kemp and Mark Hedden, who is also a Keys Weekly columnist and contributor. 

An opening reception for the show entitled, “Photo/Work” will take place at the gallery from 5 to 7 p.m. on Friday, May 5. The show will be on display until May 23. 

“Most of my shows have been of large, documentary photography projects – environmental portraits, street photography nightscapes and other topics. I’m really looking forward to showing some work that I’ve shot outside of those projects, stuff that maybe hasn’t had a home elsewhere,” Hedden said. “Some are images from the start of a new project, some are continuation of older projects, and some are standalone photos that I hope bring their own context with them.”

Hedden is a writer, photographer and semi-professional birdwatcher. He has lived and worked in Key West for close to 30 years. His photo work is primarily documentary, often accompanied by text. Inspired by the concept of resource partitioning in the natural world, where multiple species coexist in the same landscape, Hedden’s work often examines the tiny island of Key West from differing perspectives, creating a series of conceptual maps of the same location.

Kemp’s photographs, often of the natural world and the water surrounding her Florida Keys home, have been shown and sold worldwide.

“Lynne Bentley-Kemp has cultivated a meditative practice of documenting the natural environment that seeps into her life,” states a description of a prior photography show at The Studios of Key West. “As a daily practice, she captures the water and sky surrounding her home each morning, resulting in thousands of images.”For more information about the show and the artists, email [email protected] or call the gallery at 305-407-6202.

Success! Please check your email for confirmation.

Sights & Scenes From Churchill Downs’ Opening Night Extravaganza: Through Eyes & Lens(es) of Coady Photography

Sights & Scenes From Churchill Downs’ Opening Night Extravaganza: Through Eyes & Lens(es) of Coady Photography

(Churchill Downs was aglow on Opening Night / All Photos by Coady Photography)

Editor’s Note:

It was a night to behold. Dazzling lights. Spectacular races. Fans pouring in, dressed to the hilt.

It was the perfect scene and the perfect setting to kick start “Kentucky Derby Week 149.”

Here’s a few views from the stellar photo team at Coady Photography, led by the fearless Kurtis Coady:

These Embarrassing Photography Stories will make you Cringe!

These Embarrassing Photography Stories will make you Cringe!

No career path is plain sailing. In anything we do, we will always make mistakes. That’s part of becoming competent in your field. A photography career isn’t an exception to the rule, and any photographer who has been around long enough will have some embarrassing or challenging stories to share. And that’s what we’re going to cover in this article. As I turn to two pro photographers and ask them to open up about a moment in photography they’d rather forget, while also sharing my own cringe-worthy story.

We hate banner ads too. Download our app for iOS, iPad, and Android and get no banner ads for $24.99/year.

My Embarrassing Photography Story

Many years ago, before finding my photography niche, I would take any opportunity that came my way. One day I received an email from a man telling me he was the manager of a model and would like me to make some photos for her portfolio. The location was in Pimlico, a very affluent part of London, so I accepted the offer. “Just some standard shots is all we need,” the manager told me over a phone call. We agreed on a fee and finalized the date.

Upon my arrival at the location–a one-bed apartment– I quickly realized although in an affluent area, this wasn’t an affluent home. That’s fine, and I’m not one to judge. Right away, they took me to the bedroom. During our conversations, there had been no previous mention of this being a boudoir shoot. The bedroom had tired wallpaper and a very clinical smell to it. On the bed were bedsheets that had faded in color over time. And then I saw the bedside table, “oh no,” I thought. There, on the side, was a big bottle of lubricant and some condoms. It became clear that the “manager” was a pimp and the “model” was an escort. Those “standard shots” quickly became soft-core adult material, images filled with nudity and adult toys. In hindsight, I should have left right away, but I was naive and, honestly, needed the money. Sex work, for all that it is, is legal in London.

We got through the shoot, and although everything felt uncomfortable, both of them were very friendly, made me a cup of tea, and gave me a box of chocolates. I left that shoot embarrassed, in a state of cringe, and needing a shower to wash away the shame. You live and learn.

Dixie Dixon’s Challenging Photography Story

Dixie Dixon

I reached out to Dixie Dixon to share some of her photography tails. Dixon is a Nikon Ambassador and has a client list that includes Disney, Marriott Bonvoy, and Kodak, to name a few.

She prefaced her stories by telling me, “I freaking love my job,” adding, “It’s been the adventure of a lifetime and one I’m so grateful for!”

However, every love story has its rocky moments, something Dixon recognizes. Admitting, “I’ve had too many cringe-worthy moments to mention in my career,” she selected two of the more memorable moments, but two she’d much rather forget.

Sickness on a Plane!

“I was traveling to Europe to give workshops at the London, Berlin, and Amsterdam Apple Stores about photography and storage for G-Technology (now Sandisk Professional.) I got on the plane, ready to rock, and as more time went by on the long flight, the sicker I started getting- my sinuses closed up, my head throbbed, and I could barely get off of the plane because I felt so weak. In a panic, I remember calling a mobile doctor who came to my room at 10 pm so I could get some meds. But he didn’t have the kind of steroid meds I would normally get in the US to knock it out quickly, and [what he gave me] didn’t even work.

“I don’t know if you’ve ever had to give workshops with a blazing sinus infection and head cold, but it was brutal. I couldn’t breathe and felt so weak, but somehow I powered through traveling and giving workshops to three different countries in a week! It was an amazing experience and yet at the same time, crazy tough. On another occasion, I got food poisoning the night I got to Vegas and had to give an all-day lecture while trying not to hurl! It was awful, and I have no idea what I said. Just thankful to get through it.”

Brett Stanley’s Photography Story Makes Him Wince

Photo by Brett Stanley

Another photographer I spoke to was Brett Stanley, the photographer behind one of the most popular stories on The Phoblographer. He admitted his story might not be the most cringeworthy, but it certainly makes him wince whenever it comes to mind.

“I was shooting in the Bahamas years ago, with a couple of models on a shipwreck at around 20ft deep. We’d been shooting for a while when I started to notice a beeping noise, but I ignored it because I assumed it was a dive alert from one of the other scuba divers nearby. It kept going off and seemed to follow us as we moved around the wreck, which was strange but again, I assumed it was one of our dive computers – so we kept shooting.

“As time went on, I started to think it was coming from me, and it was then I noticed a little red light blinking on my camera housing in time with the beeps – it was the moisture alarm! My housing had leaked and I’d ignored it because I’d never heard that noise before. Needless to say, I hoofed it back to the boat and luckily saved my camera. It was just a hair in the o-ring and the leak was very slow – luckily!”

Final Thought

Several on-the-job moments will challenge a photographer. While we always wish for the perfect gig, free of drama and stress, that’s not always going to happen. In any challenging scenario, the best thing to do is to keep calm and focus on the fundamentals. The more experience you have, the better positioned you will be to handle the tricky times throughout your career.

Big thanks to Dixon and Stanley for sharing their stories. If you have a cringe-worthy story or a story where you faced adversity while making photographs, let me know in the comments below. Thanks for reading.

San Francisco Proposal Photographer Offers New SF Locations And Photography Packages

San Francisco Proposal Photographer Offers New SF Locations And Photography Packages
San Francisco Proposal Photographer

San Francisco Proposal Photographer

San Francisco Romantic Proposal

San Francisco Romantic Proposal

San Francisco Proposal Photography

San Francisco Proposal Photography

New photography packages for proposals now available at San Francisco Proposal Photographer, providing beautiful, timeless photos to cherish for a lifetime.

SAN FRANCISCO, CA, UNITED STATES, April 30, 2023/EINPresswire.com/ — San Francisco Proposal Photographer is excited to announce the launch of their new proposal photography packages and locations, which aim to capture life’s intimate moments with skilled discretion and artistry. The studio has added several enchanting locations for proposals in San Francisco to its list, including Golden Gate Bridge, Baker Beach, Russian Hill, Ina Coolbrith Park, Sutro Baths, Fairmont Rooftop, Japanese Tea Gardens, Lovers Lane, Pier 14, and Muir Woods.

For more information, go to https://sanfranciscoproposalphotographer.com

The studio provides four different proposal packages, each of which is designed to capture the unique essence of the moment and offer beautiful and timeless photos to cherish for a lifetime. Package A includes a smartphone shoot with all photos delivered to the client, while Package B provides professional camera coverage of the proposal. Package C includes everything in Package B along with a 10-15 minute photo session, and Package D offers a 45-minute photo shoot.

“We are thrilled to be able to offer our clients the opportunity to capture their special moment in some of the most beautiful locations in San Francisco,” said the owner of the studio. “We strive to provide our clients with the highest quality proposal photography services, and our new packages and locations are sure to make their proposal even more memorable.”

San Francisco Proposal Photographer understands the significance of a proposal and strives to provide couples with the perfect setting and the ideal photos to commemorate their special day. In addition, the studio encourages clients to come up with their own surprise proposal ideas and unique ways to make their special moment even more memorable.

A recent customer commented:”It was a pleasure working with this team. I organized a proposal shoot with them and they were discrete, punctual, and enthusiastic. The pictures came out great and my fiance had no idea it was coming. Highly recommend them!”.

For more information about the studio’s photography packages and locations, visit the San Francisco Proposal Photographer.

###

San Francisco Proposal Photographer
2150 Post St, San Francisco, CA 94115
(415) 812-5014

Eric Smith
San Francisco Proposal Photographer
+1 415-812-5014
email us here

image

Panasonic LUMIX G95: Elevate Your Photography

Panasonic LUMIX G95: Elevate Your Photography

This article contains affiliate links to products selected by our editors. Smart Carting may receive a commission for purchases made through these links.

The Panasonic LUMIX G95 bundle might be worth considering if you are searching for a top-notch camera for photography and videography. This bundle comes with a camera, lens, microphone, and backpack, and offers many features that can elevate your photography and videography experience.

I recently purchased the Panasonic G95 bundle, and I am quite impressed with its performance. The camera is easy to use and produces high-quality images and videos. The microphone that comes with the bundle is a great addition, as it helps to capture clear audio during video recordings. The photo and video backpack are also very useful for carrying the camera and its accessories.

One thing that I particularly like about this camera is its 4K V-LOG L video feature. It allows me to capture high-quality videos with log characteristics and 12 stops of dynamic range, making it easier to edit and produce professional-looking videos. Moreover, the 4:2:2 HDMI output feature allows me to connect the camera to an external monitor while recording a video, which is very useful for monitoring the footage.

Bundle Includes Everything You Need

Panasonic LUMIX G95

Credit – Amazon.com

This camera model is the Panasonic LUMIX G95 20.3MP Mirrorless Camera bundle includes everything you need to start capturing high-quality photos and videos. The bundle includes the camera body, a 12-60mm F3.5-5.6 MFT lens, a lightweight on-camera microphone, and a photo and video backpack. This means you can start shooting right away and have all the equipment you need to do so.The camera also features a four-thirds sensor, which is a 20.3-megapixel Digital Live MOS Sensor without a low-pass filter. This sensor attains maximum performance with a maximum sensitivity of ISO 25600. With this kind of performance, you can capture high-quality images and videos in any lighting condition.

Panasonic LUMIX G95: Exceptional Video Capabilities

Panasonic LUMIX G95

Credit – Amazon.com

You can find the Panasonic LUMIX G95 20 in stores.3MP Mirrorless Camera is also exceptional when it comes to video capabilities. It can capture 4K 24/30p video with pre-installed V-Log L, which offers exceptional flexibility in post-production. With log characteristics and 12 stops of dynamic range, you can make footage look exactly how you want it in post.The camera also features a 4:2:2 HDMI output, which allows for real-time image output to an optional external monitor in 4:2:2 / 8-bit via an optional micro HDMI cable simultaneously while recording video. This makes it easier to monitor your footage as you shoot and make any necessary adjustments on the fly.

Panasonic LUMIX G95: High-Quality Viewfinder

Panasonic LUMIX G95

Credit – Amazon.com

Reviews of the Panasonic LUMIX G95 20 have been positive.3MP Mirrorless Camera also features an OLED Live View viewfinder. This viewfinder offers a high-quality view of your subject, making it easier to frame and focus your shots. The viewfinder is also adjustable, so you can find the perfect angle for your shooting style.With the viewfinder, you can get a clear, detailed view of your subject in any lighting condition. This makes it easier to get the shot you want and ensures that your photos and videos come out looking great.

Panasonic LUMIX G95: Exceptional Picture Quality

Panasonic LUMIX G95

Credit – Amazon.com

If you’re concerned about picture quality, the Panasonic LUMIX G95 20 is worth considering.3MP Mirrorless Camera is exceptional. It has been ranked 5.0 out of 5.0 for picture quality. This is thanks to the camera’s four-thirds sensor, which offers maximum performance with a maximum sensitivity of ISO 25600.The camera also features image stabilization, which has been ranked 4.3 out of 5.0. This helps to ensure that your photos and videos come out looking sharp and clear, even when shooting in low-light conditions or with a shaky hand.

Great for Documentary Filmmaking

Panasonic LUMIX G95

Credit – Amazon.com

Features of the Panasonic LUMIX G95 20 include..3MP Mirrorless Camera is a great choice for documentary filmmaking. It has been reviewed by a professional documentary filmmaker who said it is their go-to camera now. The camera’s exceptional video capabilities, including 4K 24/30p video capture and pre-installed V-Log L, make it easy to capture high-quality footage.The camera also comes with a lightweight on-camera microphone, which is great for capturing audio in the field. Plus, the photo and video backpack makes it easy to carry all your equipment with you wherever you go. Overall, the Panasonic LUMIX G95 20.3MP Mirrorless Camera is a great choice for anyone looking to capture high-quality photos and videos.

Pros:

  • The Panasonic Lumix G95 offers exceptional picture quality, with a 20.3-megapixel Digital Live MOS Sensor without a low-pass filter.
  • This camera bundle comes with a lightweight on-camera microphone, perfect for capturing high-quality audio during video shoots.
  • The Panasonic Lumix G95 offers real-time image output to an optional external monitor in 4:2:2 / 8-bit via an optional micro HDMI cable simultaneously while recording video.

Cons:

  • The Lumix box had been opened, which may indicate that the camera was previously used or returned.
  • The auto-focus feature of the Panasonic Lumix G95 is ranked 4.3 out of 5, which might not be as impressive as other cameras in the same price range.
  • The maximum ISO sensitivity of the Panasonic Lumix G95 is 25600, which might not be enough for low light situations.

Read also:

Conclusion

Overall, I am very satisfied with my purchase of the Panasonic G95 bundle. It offers many useful features, and the bundle includes everything that I need to get started with photography and videography. The price is also reasonable, considering the quality of the camera and its accessories. If you are looking for a reliable camera that can produce high-quality images and videos, then the Panasonic G95 bundle is definitely worth considering.

Questions & Answers:

Question: Can the Panasonic Lumix G95 shoot 4K video?

Answer: Yes, the Panasonic Lumix G95 can shoot 4K video at 24/30p.

Question: Does the camera bundle come with a backpack?

Answer: Yes, the bundle includes a photo and video backpack.

Question: Is the Panasonic Lumix G95 a good camera for professional filmmakers?

Answer: Yes, the Panasonic Lumix G95 is a great camera for professional filmmakers, especially those looking for a budget-friendly option with features like real-time image output and the ability to shoot in Cine V Log.

Photographer Manuel Carrillo transforms ordinary moments into expressions of quiet eloquence

Photographer Manuel Carrillo transforms ordinary moments into expressions of quiet eloquence
“Untitled (vendor and shadows, Mexico City),” Manuel Carrillo. (Courtesy of the New Mexico Museum of Art)

Combining street photography with the tenets of modernism, photographer Manuel Carrillo (1906-1989) portrayed his native Mexico from the perspective of an affectionate observer, transforming ordinary moments into expressions of quiet eloquence. “Manuel Carrillo: Mexican Modernist” is on view at the New Mexico Museum of Art, through Feb. 4, 2024. Curated by Katherine Ware, the show highlights 19 of his works, drawn primarily from the museum’s collection.

Carrillo turned to the camera late in life, joining the Club Fotográfico de México (Photographic Club of Mexico) at the age of 49. He quickly found his voice by making images of everyday life throughout Mexico, celebrating local culture and the human spirit. His work is an extension of Mexicanidad, a movement begun in the 1920s to forge a Mexican national identity free of foreign influence. Stylistically, Carrillo was largely inspired by a mix of Mexican artists who trained abroad, and international artists who converged on Mexico during that fertile period.

“Carrillo’s skill as a photographer relies on his ability to transform the seemingly mundane into something visually and emotionally engaging,” said Mark White, the museum’s executive director. “Through unexpected juxtapositions and unusual camera angles, he encourages us to take a second look at daily life in Mexico. At the risk of stating the obvious, there’s a lot of heart in Carrillo’s work.”

“Untitled (woman and child from above, Mexico City),” Manuel Carrillo. (Courtesy of the New Mexico Museum of Art)

The artist’s interest in Indigenous cultures and his use of bright sunlight to create compositions with dramatic shadows and bold geometric forms aligns with modernist aesthetics, while his practice of finding a picture by wandering cities and towns across Mexico is more aligned with the tradition of street photography.

Unlike some of his predecessors, particularly those from abroad, Carrillo captures events of the ordinary world without idealizing or aestheticizing, showing instead his empathy for working people and lives lived in harmony with nature.

Augmenting the exhibition are photographs on loan from two private collections, one a promised gift to the museum. “Manuel Carrillo: Mexican Modernist” is on view through Feb. 4, 2024.

Having a goal in mind can improve photography outcomes

Having a goal in mind can improve photography outcomes

JavaScript is used in a variety of ways to improve your browsing experience, such as validating and executing form submissions and allowing interactive content. Below, we have provided simple instructions for enabling JavaScript in the most popular web browsers. To determine your browser version, click on Help in the menu bar of your browser and then select About.

Once you have enabled Javascript on your browser, click here to return to union-bulletin-com.newyork1.cms.townnews-staging.com.

The following instructions describe how to enable JavaScript for:

Internet Explorer, Firefox, Netscape, Opera, Safari, Chrome, Mozilla and AOL browsers.


Internet Explorer 5 and above

  1. Select Internet Options from the Tools menu.
  2. In Internet Options dialog box select the Security tab.
  3. Select the earth(Internet) icon.
  4. Click the Custom Level… button. The Security Settings dialog box will pop up.
  5. Under Active Scripting category select Enable.
  6. Click OK twice to close out.
  7. Finally, Refresh your browser.

Internet Explorer 5.X for Mac OS X

  1. Select Preferences from the Explorer menu.
  2. Click the arrow next to Web Browser.
  3. Click Web Content.
  4. Under Active Content check Enable Scripting.
  5. Click OK.
  6. Finally, Refresh your browser.

Internet Explorer 5 for Mac OS 9

  1. Select Preferences from the Edit menu.
  2. Click the arrow next to Web Browser.
  3. Click Web Content.
  4. Under Active Content check Enable Scripting.
  5. Click OK.
  6. Finally, Refresh your browser.

Internet Explorer 4.X

  1. Select Internet Options from the View menu.
  2. Click the Security tab.
  3. Click Custom.
  4. Click Settings.
  5. Scroll down to locate Scripting.
  6. Click Enable for Active Scripting.
  7. Click OK.
  8. Finally, Refresh your browser.

Firefox (Windows)

  1. Select Options from the Tools menu.
  2. Click the Content icon/tab at the top of the window.
  3. Check Enable JavaScript.
  4. Click OK.
  5. Finally, Refresh your browser.

Firefox (MAC)

  1. Select the Firefox menu item from the Apple/System bar at the top of the screen.
  2. From the drop-down menu, select Preferences…
  3. Select the Security icon/tab at the top of the window.
  4. Check the Enable Javascript checkbox under the Web Content category.
  5. Close the Options window to save your changes.
  6. Finally, Refresh your browser.

Netscape 7.X

  1. Select Preferences from the Edit menu.
  2. Click the arrow next to Advanced.
  3. Click Scripts & Plugins.
  4. Check Navigator beneath “Enable Javascript for”.
  5. Click OK.
  6. Finally, Refresh your browser.

Netscape 6.X

  1. Select Preferences from the Edit menu.
  2. Click Advanced
  3. Check Enable JavaScript for Navigator
  4. Click OK.
  5. Finally, Refresh your browser.

Netscape 4.X

  1. Select Preferences from the Edit menu.
  2. Click Advanced.
  3. Check Enable JavaScript
  4. Check Enable style sheets
  5. Click OK.
  6. Finally, Refresh your browser.

Netscape 4.X for Mac OS 9

  1. Select Preferences from the Edit menu.
  2. Click Advanced.
  3. Check Enable JavaScript
  4. Click OK.
  5. Finally, Refresh your browser.

Opera (Windows)

  1. In the Tools drop-down menu at the top of the window, select Preferences…
  2. Select the Advanced tab at the top on the Preferences window.
  3. Find the Content item in the list on the left-side of the window and select it.
  4. Check the Enable JavaScript checkbox.
  5. Click OK to save your changes and close the Preferences window.
  6. Finally, Refresh your browser.

Opera (MAC)

  1. Select the Safari menu item from the Apple/System bar at the top of the screen.
  2. From the drop-down menu, select Preferences.
  3. Select the Content icon/tab at the top of the Preferences window.
  4. Check the Enable JavaScript checkbox.
  5. Click OK to save your changes and close the Preferences window.
  6. Finally, Refresh your browser.

Safari (MAC)

  1. Select the Safari menu item from the Apple/System bar at the top of the screen.
  2. From the drop-down menu, select Preferences.
  3. Click Security icon/tab at the top of the window.
  4. Check the Enable JavaScript checkbox.
  5. Close the window to save your changes.
  6. Finally, Refresh your browser.

Safari (Windows)

  1. In the Edit drop-down menu at the top of the window, select Preferences…
  2. Select the Security icon/tab at the top on the window.
  3. Check the Enable Javascript checkbox.
  4. Close the window to save your changes.
  5. Finally, Refresh your browser.

Chrome (Windows)

  1. Select Customize and control Google Chrome (wrench Icon) to the right of the address bar.
  2. From the drop-down menu, select Options.
  3. Select the Under the Hood tab at the top of the window.
  4. Under the Privacy heading, select the Content settings button.
  5. On the left, under the features heading, select JavaScript.
  6. Select the Allow all sites to run JavaScript radio button.
  7. Finally, close both preference windows, and refresh the browser.

Chrome (MAC)

  1. Select the Chrome menu item from the Apple/System bar at the top of the screen.
  2. From the drop-down menu, select Options.
  3. Select the Under the Hood tab at the top of the window.
  4. Under the Privacy heading, select the Content settings button.
  5. On the left, under the features heading, select JavaScript.
  6. Select the Allow all sites to run JavaScript radio button.
  7. Finally, close both preference windows, and refresh the browser.

Mozilla 1.X

  1. Select Preferences from the Edit menu.
  2. Click the arrow next to Advanced.
  3. Click Scripts & Plugins.
  4. Check Navigator beneath “Enable Javascript for”.
  5. Click OK.
  6. Finally, Refresh your browser.

AOL 7.0 and above

  1. Select Preferences from the Settings menu.
  2. Click Internet Properties (WWW) under Organization.
  3. Click the Security tab.
  4. Check the Custom Level button.
  5. Scroll down to locate Scripting.
  6. For Active Scripting click Enable.
  7. Click OK, and then OK again to close all dialogs.
  8. Close the Preferences window, and then Reload the page.

The big picture: Syd Shelton meets the kids of pre-gentrification south Dublin

The big picture: Syd Shelton meets the kids of pre-gentrification south Dublin
image

In 1985, Syd Shelton recalls, children on bikes still ruled the streets; there weren’t so many cars, and kids didn’t have phones to stare at. He took this picture in Dublin, near the docks. He was in the city preparing a photographic project called Ireland: A Week in the Life of a Nation. Fifty photographers, some famous, such as William Klein, were due to arrive to capture the country in pictures. In the meantime, Shelton had some time to wander. He thinks of this picture as a street portrait rather than something entirely spontaneous: “I was using flash and a tripod and the image was very much a conversation between me and the kids.”

The street with the gasometers was in Ringsend, on the south bank of the Liffey. At the time it was entirely a residential area – some of the houses were built by William Beckett, Samuel’s grandfather, in the 1880s. Many of them have now been demolished. Ringsend is the home of Google’s European HQ, and the gasometer has been redeveloped as luxury apartments. Shelton has another photograph from that afternoon in 1985. “I got the kids on bikes to gather their mates,” he says, “and I took a picture of 40 of them, with the gasometer behind.”

This picture is included in a group exhibition at the Atlas Gallery in London called Seen Not Heard, devoted to the idea of childhood, with a percentage of the sale price for each print sold donated to Save the Children. For Shelton, it represents something of a lost world, and not only because the streets themselves no longer exist. “The fact is,” he says, “you can’t take pictures of children any more. I was doing a story on London Road in Brighton a few years ago and took a picture of some children queueing for an ice-cream. Two minutes later, two police cars screeched to a halt at the kerb. Someone had called 999.”





