Photography

A guide to finding your photography style: Part 10

A guide to finding your photography style: Part 10

This 10-part series on finding and refining your unique style has been a journey that requires not only technical skills but also a deep sense of self-trust and confidence. Trusting your intuition is a key aspect of developing a distinctive photographic style that reflects your artistic vision and voice. Exploring the significance of trusting your intuition and providing actionable steps to build confidence in your own photographic style is all part of the process.

Understanding intuition in photography

Intuition is often described as a gut feeling or a sense of knowing without conscious reasoning. In photography, your intuition is your artistic compass. It’s the inner voice guiding you toward subjects, compositions and techniques that resonate with your authentic self. Learning to trust this intuition is crucial in developing a style that is uniquely yours.

It also means ignoring the itty-bitty voice of self-doubt, it’s a fine line sometimes.

Embrace self-discovery

Developing confidence in your photographic style begins with understanding yourself as an artist. Take time to reflect on your interests, passions, values and what motivates you to pick up the camera. What stories do you want to tell? What emotions do you want to evoke? The answers to these questions will help you define your unique photographic voice.

Embrace self-discovery as an ongoing process, allowing yourself to evolve and adapt as your understanding of your artistic self deepens.

Emulate, then innovate

Learning from other photographers you admire can provide valuable insights into various techniques and approaches. Begin by emulating styles or techniques that resonate with you. As you practice and experiment, you’ll start to identify elements that align with your intuition and contribute to your own style.

The goal is not to imitate but to learn from the masters and then innovate by infusing your personal vision, experiences, and emotions into your work. Push the boundaries and make the art your own.

Embrace imperfections

Photography is a journey of growth, and mistakes are an inevitable part of that journey. Embrace imperfections and failures as valuable learning opportunities. Don’t be afraid to experiment and take risks; these experiences contribute to your growth as a photographer and shape your unique style. Remember that exceptional things can happen when you step out of your comfort zone.

Trusting your intuition also means accepting that not every photograph needs to be technically flawless. Sometimes, the most powerful images are the ones that capture raw emotions and authentic moments, over technical perfection.

Seek meaning, not approval

While positive feedback can be motivating, seeking validation from others can hinder your creative growth. Shift your focus from pleasing others to finding meaning and satisfaction in your work. When you create images that align with your intuition and resonate with your own emotions, you’re more likely to develop a style that is authentic and captivating.

Photography is a form of self-expression, and when you create from the heart, your confidence in your style will naturally grow. Your passion is seen through your work and can often resonate with others.

Embrace patience and evolution

Building confidence in your photographic style is a journey that requires patience. Developing a unique style takes time, practice, and a willingness to adapt and evolve. Don’t rush the process; allow yourself to explore, experiment, and refine your style gradually.

Embrace the evolution of your style, and trust that with each image you create, you’re getting closer to fully expressing your artistic intuition. This doesn’t mean you ever stop striving to learn to grow and evolve. Creative expression is always evolving. And remember, an easy journey is never promised.

Practice mindfulness in photography

Mindfulness—the practice of being fully present in the moment—can greatly enhance your photographic style. As you compose and capture images, pay attention to your instincts and emotions. Listen to your intuition as it guides you to frame a scene, adjust settings, or choose a focal point.

Mindfulness allows you to connect with your surroundings and emotions, resulting in photographs that are more genuine and aligned with your unique style. Being in the moment, allows you to fully enjoy the creative experience. Just snapping or the ‘spray & pray’ method isn’t particularly satisfying.

Trust your intuition

Trusting your intuition is an essential step in developing a confident and authentic photographic style. By understanding yourself as an artist, embracing self-discovery, learning from others while innovating, embracing imperfections, seeking meaning over approval, and practicing mindfulness, you can cultivate a style that reflects your inner artistic voice.

Remember that your photographic journey is personal and unique. Developing a distinctive style requires patience, self-compassion, and a deep belief in your creative instincts. So, trust your intuition, let your passion guide you, and watch your confidence in your photographic style flourish.

I hope you have enjoyed this series and got some valuable insight into developing and finding your own creative style. Happy shooting and refining your style!

In case you missed it:

Wildlife Photography Is My Passion, And Here Are The Best 45 Of My Shots

Wildlife Photography Is My Passion, And Here Are The Best 45 Of My Shots

Photography is art, but it first needs to become a passion… Only with passion can one create art. Wildlife photography is my passion. However, just being in nature changes my creativity for the better. The creativity generated by the surroundings of nature flows right back into other areas of my photography, such as landscape and cityscape photography. I try as much as possible to make use of other photography genres, which forces me to become even more creative.

“Sometimes I do get to places just when God’s ready to have somebody click the shutter.” Ansel Adams

Although I am not a full-time professional photographer, photography is my passion. There is no doubt about it. Second to photography but just as important is my passion for nature, wildlife and conservation. I was fortunate to have visited many places during my lifetime and even more fortunate to have had the opportunity to capture those moments and memories in my photographs.

Workshops, masterclasses and exhibitions at Bucharest event promoting the art of photography

Workshops, masterclasses and exhibitions at Bucharest event promoting the art of photography

Is This a Fest? – photography days in Bucharest, a special event aimed at promoting the art of photography, will take place between August 28 – September 3 with a program comprising workshops, masterclasses, talks with artists, portfolio review sessions, and photography exhibitions.

The event will be held at the Resource Center in Photography (CdRF) and is aimed at both amateurs and people passionate about photography, as well as those who want to become professionals in the field.

Through workshops supported by well-known and active photographers such as Andrei Păcuraru (PAC), Cornel Lazia, Adi Bulboacă and Sorin Florea, participants will be able to focus on specific categories of photography, such as portraiture, composition, aesthetics, or niche services such as product photography with the phone.

Meanwhile, the portfolio review sessions, supported by advertising professionals and photographers, will bring the best advice on selecting and arranging photos in the portfolio and their stories.

At the same time, specialists such as Ellen K. Willas – founder and director of WILLAS contemporary, and Wiktoria Michalkiewicz – founder, talent agent, strategist and artistic consultant of Rezo Agency, will share their experience during online masterclasses.

A photography exhibition of the graduates of the CdRF workshops will await visitors in the CdRF space from September 1 to 8, while the show signed by Cornel Lazia, which will have its opening on September 1 at the Is This Art? gallery, will be available until September 30. Access to exhibitions is free.

Further details are available here.

irina.marica@romania-insider.com

(Photo source: the organizers)

Wedding photographer hits out at ‘tone-deaf’ request from bride after Maui fires

Wedding photographer hits out at ‘tone-deaf’ request from bride after Maui fires

A wedding videographer has criticised brides for worrying about their big days and asking for refunds amid relief efforts for the Maui wildfires.

Shayna Kiesler couldn’t believe how many requests she’d received from individuals looking to get their non-refundable deposits back from her company, Portola Wedding Films in Maui, because they would no longer be able to host their nuptials on the island. The community is being forced to not only deal with the loss of loved ones, landmarks, homes, businesses, and crops, but as she noted, brides-to-be are also worried about their personal fortunes too.

According to Hawaii Governor Josh Green, as of 16 August, more than 110 lives have been lost due to the devastating and unexpected fires that engulfed Lahaina last week. Governor Green also speculated that there are “probably still over 1,000” unaccounted for.

Kiesler’s sister, Reyna Edmonds, posted a TikTok on 14 August urging brides to stop making these monetary demands, as she noted conditions on the island are “horrific”. The Seattle-based wedding photographer attempted to appeal to the frustrated individuals, while also opening their eyes to the realities of Maui residents right now.

“While I realise to brides this is the most important day of their life, it is extremely tone-deaf for what is going on on the island of Maui,” she said. “Please be patient, please give them their time that they need to figure out what is going on, and only reach out if you’re actually willing to help.”

Edmonds also spoke to People, where she suggested that tourists don’t seem to have “empathy” for individuals like her sister. “From a vendor’s perspective, it’s frustrating. These people have no empathy for what the island is going through and what these [wedding] vendors are going through,” she proclaimed. “Like, yeah, my sister didn’t lose her home, but she knows people who have and her friends still have family that are missing.”

She continued: “I think that… everyone wants their beautiful wedding day, and [brides] can sometimes be a little bit selfish without realising they are and in this case, I felt like it was really happening and I just felt like I needed to say something on behalf of my sister.”

To assist struggling wedding vendors on the island, Edmonds is connecting them with other photographers and planners willing to service their customers for free so that the money they’ve paid to Maui business owners can stay with them.

“Obviously, I couldn’t imagine planning your dream wedding and then having this happen but I think that like everyone just needs to have a little bit of empathy,” Edmonds confessed.

In her video caption, she asked interested viewers to visit her website if they would like to donate, need help with their own wedding, or can provide services for those who do.

The Independent hascontacted Edmonds to request comment from her and her sister.

Milky Way Photography: How to Take a Picture of our Galaxy

Milky Way Photography: How to Take a Picture of our Galaxy

Photographing the Milky Way no longer represents a technical challenge to be met only by professionals. Thanks to technological advances in cameras and lenses, taking a beautiful photo of the night sky is within anyone’s reach.

There are just a few important rules to follow to get great pictures of our galaxy: pick the right season when the Milky Way is best visible, get the necessary equipment, and find the best settings: exposure time, focus, etc. Being prepared is key to setting up your shot.

© Greg Rakozy / Unsplash
This Milky Way photo is among the most beautiful landscape shots © Greg Rakozy / Unsplash Taken with a Canon EOS 5D Mark II: 50.0 mm, ISO 2500, 25s at Tony Grove Lake in Utah

What does it mean to photograph the Milky Way?

Even before you start planning your Milky Way shooting trip or figuring out the right settings, it is important to define what we mean by photographing our galaxy. When we talk about photographing the Milky Way, we are actually talking about its core, the galactic center, its brightest part. It is this region that is the most densely populated with stars, clusters, and colorful nebulas.

When best to photograph the Milky Way?

In the Northern Hemisphere, the best time to photograph the Milky Way is from April to September. In the Southern Hemisphere, this period is from February to October. The summer months (June, July, August) offer the best conditions for taking pictures of the Milky Way.

Although our galaxy can be observed all year round, to get the most detail, you should plan your Milky Way photo trip during those high-visibility months.

On the day of shooting, the best time to start your photo shoot is usually between midnight and 5 a.m., when the Milky Way will be positioned the highest above the horizon. However, always remember to locate its position in advance, since depending on the time of year, it may only be visible for a few minutes, and sometimes not at all.

Depending on its position, you will be able to photograph the Milky Way for several hours or several minutes © Eberhard Grossgasteiger / Pexels
Depending on its position, you will be able to photograph the Milky Way for several hours or several minutes
© Eberhard Grossgasteiger / Pexels

Where to photograph the Milky Way?

In France, the best places to take pictures of the Milky Way are at higher elevations, especially in the mountains, such as in the Clarée River Valley or the Massif des Écrins, in the Alpes. However, places like the south of Brittany or sparsely populated rural areas also offer favorable conditions for photographing the Milky Way.

Worldwide, there are plenty of choice photo locations, very popular among astrophotographers, such as the Dolomites in Italy, the Banff National Park in Alberta, Canada, and the Atacama Desert in Chile.

What are the best conditions to take pictures of the Milky Way?

The ideal conditions to take a picture of the Milky Way are clear atmospheric conditions. This means a cloudless sky and absence of wind, humidity, and light pollution (streetlights, searchlights, etc.).

While the location of your Milky Way photo shoot is important, the absence of light pollution in the area is crucial. To get a great photo, you must avoid at all costs cities and sites with intense lighting. When shooting near a light source, take into account its direction. Try to pick open spaces away from populated areas.

You need also to pay attention to the Moon. Moonlight might overwhelm the Milky Way and make its details less visible. You should therefore schedule your photo outing on a dark night, during New Moon or First or Last Quarter.

While a clear sky is ideal for your Milky Way photos, the presence of the Moon, wind, partial cloud cover, or some light pollution might give you a chance to generate interesting effects and create an original photo.

The presence of light can make for an original Milky Way photo © Pixabay - Pexels Taken with a Canon EOS 5D Mark II: 20.0 mm, ƒ/2.2, 25.1s and ISO 2500
The presence of light can make for an original Milky Way photo © Pixabay – Pexels Taken with a Canon EOS 5D Mark II: 20.0 mm, ƒ/2.2, 25.1s and ISO 2500

What equipment to use?

Although taking a photo of the Milky Way has become easier than it used to be, there are still a few pieces of equipment essential to your success*.

The camera

You don’t need a professional camera to photograph the Milky Way: nowadays, most SLR cameras can capture great images, as can a number of smartphones.

Whatever camera you decide to work with, you should make sure that it has a manual mode, which will be key to setting up your camera and capturing the Milky Way. The manual mode will allow you to adjust ISO sensitivity and exposure time.

Lenses

We recommend that you use the brightest lens possible; in other words, a lens with a large aperture which will capture maximum light. At the same time, use a wide-angle lens (focal length less than 50 mm) to capture the entire Milky Way visible and the surrounding landscape. 

Most conventional lenses, however, can still take good pictures, whether it is a wide-angle lens or a standard kit, such as an 18–55 mm or even an 18–135 mm lens. The difference in rendering will be in the angle of the field: whether it is a general view, a panorama, an image of the very core, a focus on the detail, etc.

The tripod is a key accessory in capturing the Milky Way Credit: PhotoMIX Company / Unsplash
The tripod is a key accessory in capturing the Milky Way
© PhotoMIX Company / Unsplash

You can switch between different lenses to vary the rendering of the Milky Way. Make only sure to adjust the other settings on your camera along with the lens.

Whatever your choice of lenses, be careful not to choose a lens with a focal length that is too large (greater than 135 mm), because, due to the Earth’s rotation, the stars can quickly grow oval and out of focus, which might spoil your Milky Way photo.

Accesories

For best results, we recommend you bring a long a few accessories:

A tripod: an essential accessory for capturing the Milky Way, and landscapes in general. To ensure a clear picture and get all the details, the camera must be perfectly steady. Stability also allows your camera to get the maximum amount of light.

• If you want to get a panoramic or a time-lapse shot, bring a panoramic rotator or an intervalometer.

A wireless remote control will allow you to set up and trigger your camera or smartphone from a distance.

A headlamp with red light will help you to find your way around at night, adjust your camera settings, illuminate foreground elements, and focus.

• Bring spare batteries and memory cards, and store them in a dry place.

• Bring warm clothes to stay warm at night, even in summer, especially if you’re photographing in the mountains.

Milky Way photo settings

There are many settings to adjust before you can take your first Milky Way photo: aperture, ISO, shutter speed, etc. Before you launch into any setting, first take the time to familiarize yourself with them and do some testing to see what works best in terms of your equipment and your project.

A photo of the Milky Way taken at ƒ/4. Credit: Alistair MacKenzie / Unsplash Taken with a Sony ILCE-7S: 16.0 mm, ƒ/4.00, 16s, ISO 6400 in Megalong Valley, Australia
A photo of the Milky Way taken at ƒ/4.
© Alistair MacKenzie / Unsplash
Taken with a Sony ILCE-7S: 16.0 mm, ƒ/4.00, 16s, ISO 6400 in Megalong Valley, Australia

The manual mode

The first thing you to do is to switch your camera from automatic to manual mode. Once in manual mode, you can go ahead and set all the other settings.

The RAW format

RAW is an uncompressed image format that preserves all the details of the scene and will facilitate processing your Milky Way photos later. By contrast, a photo in the basic JPEG format loses detail and limits post-production.

If you want to have a choice between the two formats, either for processing or printing, you can save your images in RAW + JPEG format.

Aperture

The aperture controls the amount of light that enters the lens of your camera. Aperture is expressed as the value of ƒ/N, where “ƒ” represents the focal length and “N” the width of the aperture.

Since the Milky Way is not very bright, the camera needs to absorb the maximum of light. Thus, your aperture should be as open as possible, which translates into the smallest possible f/N aperture value. The recommended value is usually between ƒ/1.8 and ƒ/3.5 (or even ƒ/4), to allow you to capture most of the stars and other details of the night sky.

A mountain lake provides a beautiful foreground for a Milky Way photo © Eberhard Grossgasteiger / Unsplash Taken with a Canon EOS 70D: 14.0 mm, ƒ/2.8, 20sec, ISO 800 in the Zillertal Alps in Italy

ISO sensitivity

ISO sensitivity refers to a setting that, like the aperture, controls the amount of light captured by your camera. Depending on the sensitivity you choose, your photo will be more, or less, bright and detailed. When photographing the Milky Way, you should choose a higher ISO to increase light sensitivity and compensate for the low brightness of the stars.

However, the higher the ISO the more sensitive the sensor is to light, and the quality of the image may degrade with the appearance of “digital noise” (grainy picture). On the other hand, if the ISO is too low, the sky and stars will be underexposed, making the Milky Way pale and poorly visible.

As a general rule, choose a sensitivity between ISO 1600 and 3200, which will allow you to capture just enough light, without losing quality or picking up noise. This is, for example, the ideal setting if you have a 24mm focal length with an aperture of f/1.4. 

If you have a smaller aperture, such as f/2.0 or f/2.8, you can gradually increase the sensitivity beyond ISO 3200, watching out for digital noise. Also, if there are any sources of light in the vicinity (street lights, the moon, etc.), consider adjusting your ISO so as not to accentuate these other external light sources and lose sharpness.

Shutter speed and exposure

To let the maximum amount of light into the camera’s sensor and make the Milky Way appear bright in your photo, in addition to the ISO and the aperture, you need to set the exposure time. The longer the exposure, the more light the camera will capture.

An exposure can last between 5 and 30 seconds, depending on your focal length. The higher your focal length, the shorter the exposure time should be.

Although a long exposure is best for capturing the Milky Way, keep in mind that an overly long exposure will result in the appearance of light trails and blurry, oval stars, due to the Earth’s rotation around its axis. For example, with a standard 18 mm lens, this phenomenon can be visible already at a 20-second exposure.

To find the right shutter speed to photograph the Milky Way, use the 500 rule, a formula for calculating the exposure time depending on the focal length: 500 ÷ focal length = exposure time. For ease of calculation, round off the result. 

The formula will vary depending on whether you use a full-frame sensor (24×36 mm), or an APS-C Nikon or Canon sensor (respectively 1.5 and 1.6 times smaller than the full-frame sensor). In this case, the calculation will be: 500 ÷ (focal length x 1.5 or 1.6) = exposure time.

Avoid excessive shutter speed when photographing the Milky Way © Brendan Miranda / Unsplash Taken with a Sony ILCE-7SM2: 18.0 mm, ƒ/3.5 – 10sec, ISO 3200
Avoid excessive shutter speed when photographing the Milky Way
© Brendan Miranda / Unsplash
Taken with a Sony ILCE-7SM2: 18.0 mm, ƒ/3.5 – 10sec, ISO 3200

For example, for a focal length of 16 mm with a full-frame sensor, the exposure time to take a picture of the Milky Way should be 500 ÷ 16 = 31.25 seconds. With a Nikon APS-C sensor, the exposure time would be 500 ÷ (16 x 1.5) = 24 seconds. With a Canon APS-C sensor, the exposure time would be 500 ÷ (16 x 1.6) = 19.5 seconds.

However, the 500 rule is not perfect. To take the example of 16mm focal length with a full-frame sensor, a 31-second exposure would carry a high risk of star trails and a blurred Milky Way. Depending on your equipment and your project, you can calculate your exposure time by taking a base of 300, 400, or 600.

Whatever you do, to ensure the optimal shutter speed, take a picture of the night sky and see if the stars are points or ovals. In the latter case, shorten the exposure time.

Getting ready for your photo trip

Knowing how to photograph the Milky Way requires preparation ahead of time © Yuting Gao / Pexelss Photo 24.0 mm – ƒ/1.4 – ISO 1600 in Elkton, Maryland, US
Knowing how to photograph the Milky Way requires preparation ahead of time
© Yuting Gao / Pexelss
Photo 24.0 mm – ƒ/1.4 – ISO 1600 in Elkton, Maryland, US

Now that you know how to set up your Milky Way shots, it’s time to get ready for your trip.

Planning around the weather conditions

To best capture the Milky Way, you need to find the dates of ideal visibility and pick a night when the sky will be clear and free of light pollution and moonlight.

There are many tools and apps that will help you find the best dates to photograph the Milky Way, including its position and visibility in the sky, moonrise and moonset times, and weather conditions: 

The position and trajectory of the Milky Way: Photopills (iOS and Android), Stellarium (iOS and Android), Night Sky (iOS), Sky Guide (iOS), Google Sky

Light pollution: Light Pollution Map; Dark Sky Finder (US and Canada)

Moon phases: Lunar calendar (enter your precise location)

Weather: Wunderground, Carrot Weather

Cloud cover: Windy, Windfinder

Cross-reference multiple data sources to make sure your calculations are right and find the optimal conditions.

Scout out your locations and preset your shots

Now that you have picked your perfect location and found the date for your Milky Way photo shoot, go out and do some scouting ahead of time. Find your ideal placement and work out your angles of view, keeping in mind the position of stars on the day of shooting.  

Once you have found your bearings, frame your shot. While any photo of the Milky Way can be beautiful, putting some work into your composition will pay off. Decide between the portrait and landscape modes, highlight foreground or background elements, etc.

Mountains, dunes, a forest clearing, a beach, a reflecting lake, old buildings, etc.: interesting foreground elements can make for elegant Milky Way photos. To highlight these features, and to help you focus, you can illuminate them with a headlamp, with your phone, or even an LED panel.

Perform composition and framing tests ahead of time on the day of the shooting to find your optimal settings.

The finishing touches

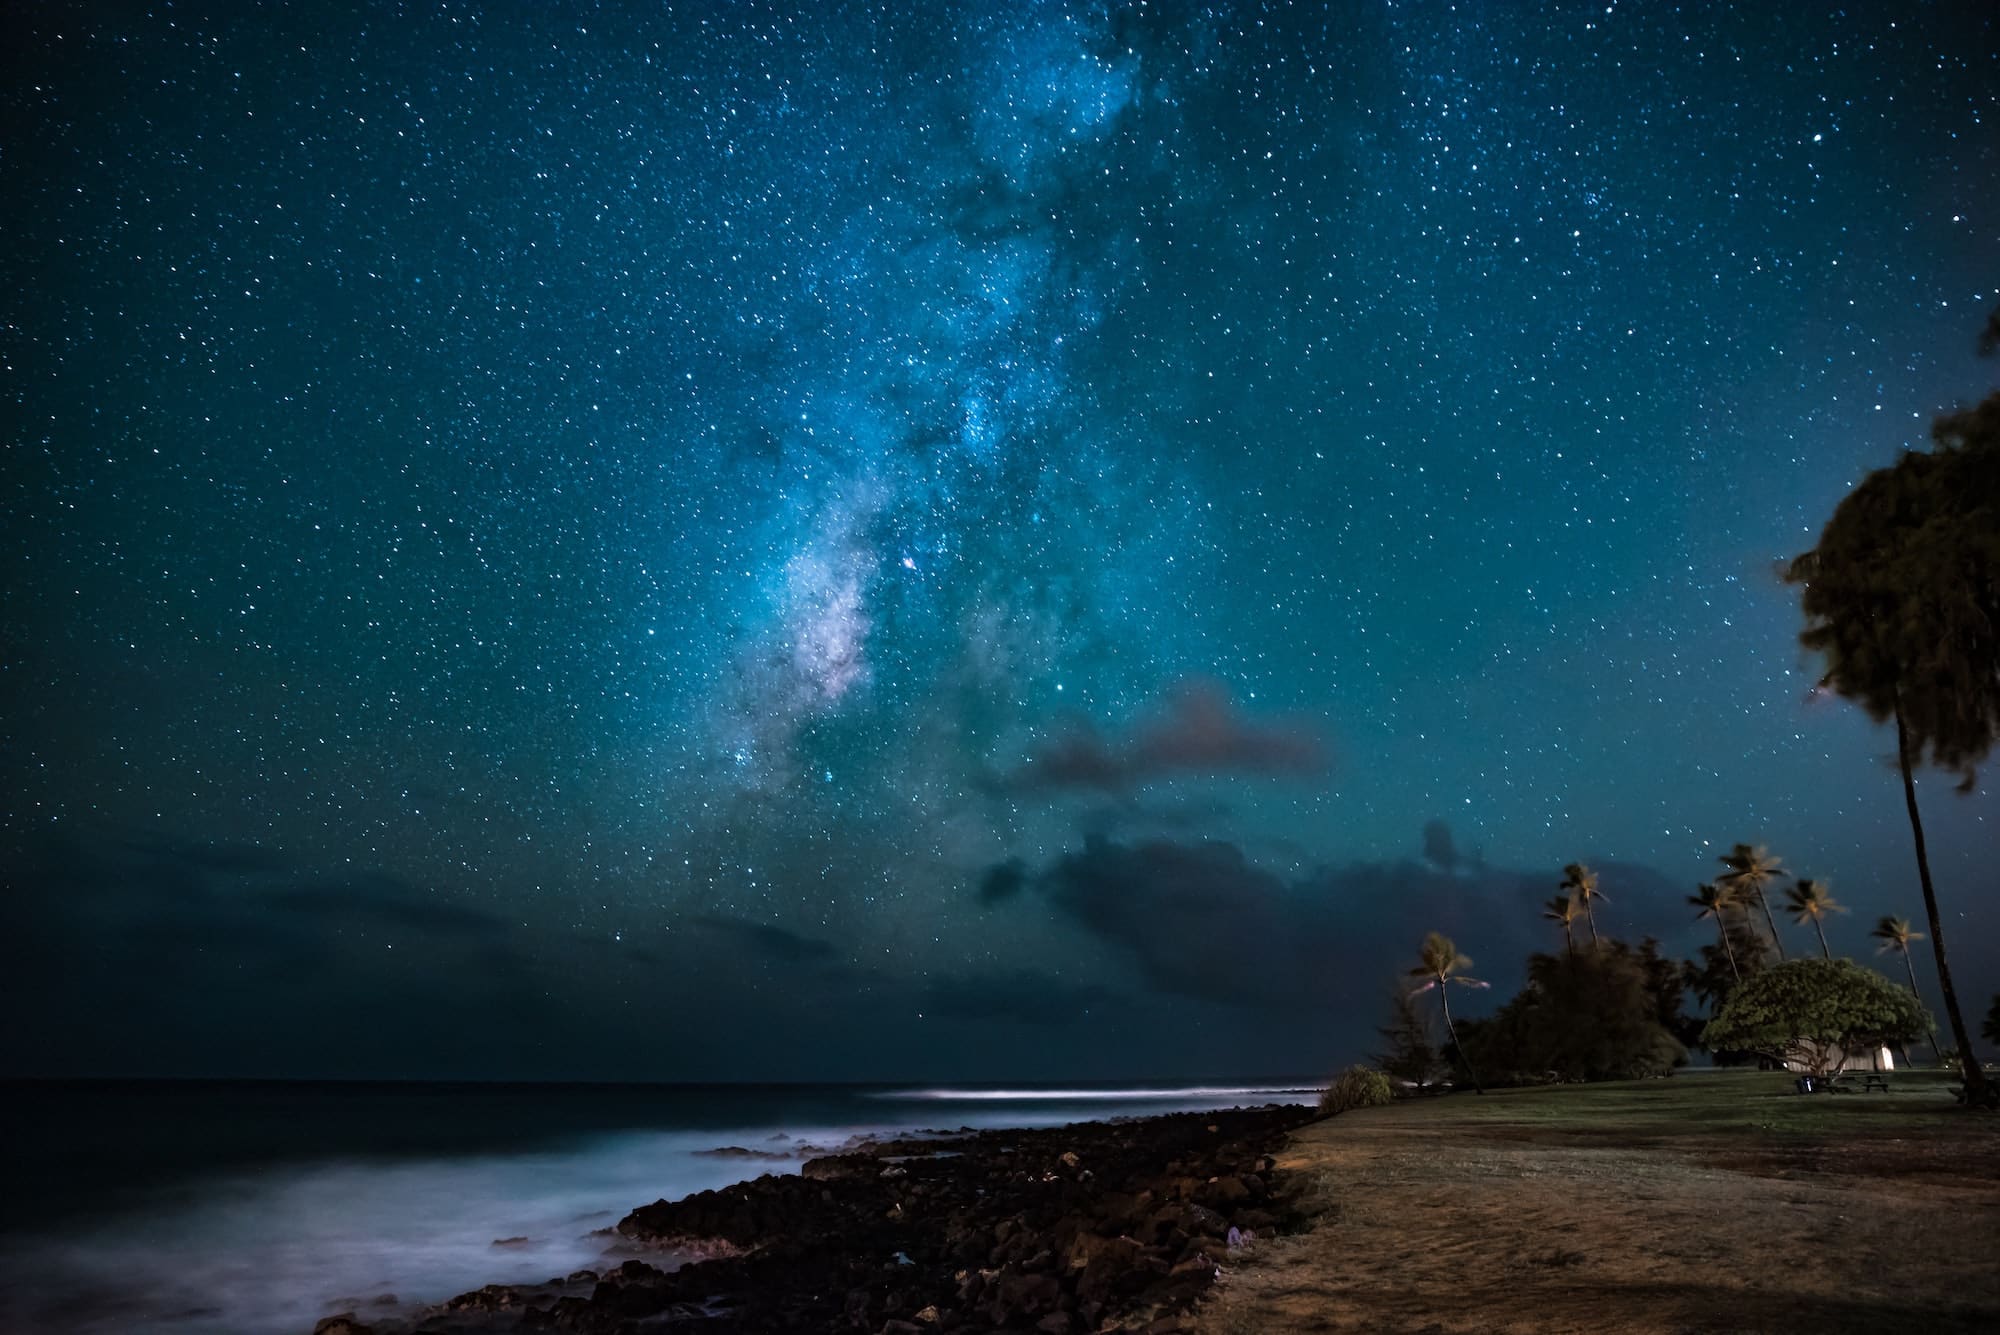
Finding an interesting foreground element enhances the Milky Way photo © Casey Horner / Unsplash Taken with a Nikon D750: 24.0mm, ƒ/2.8, 25sec, ISO 3200 in Kauai County, Hawaii

Now that the day of the shoot has arrived, try to get to your location by day, during the golden hour, to set everything up and make any final adjustments: your placement, framing, composition, aperture, etc.

Arriving before nightfall will allows you to prepare your photos with greater precision and leave more time for taking pictures of the Milky Way. Early preparation will also make sure you don’t disturb other photographers who might be working in the vicinity. 

When you’re all set, start testing: your maximum ISO, exposure times, aperture settings, etc. until you’re confident and ready.

Focusing 

Manual focus is the final setting before the shoot: make sure the Milky way is going to be in focus and avoid blurry stars. There are two types of focus for astrophotography:

  • Infinity focus

Infinity focus is a hyperfocal distance setting available on a number of camera models. It is represented by the symbol ∞ on the focus ring. It allows you to obtain sharp images with a better depth of field. 

Note, however, that this “infinity” focus may not be the ideal setting for photographing the Milky Way. Depending on your project, it may be better to use manual focus, especially if you’re aiming to take less conventional pictures.

A picture of the Milky Way is a photographer’s dream © Benjamin Voros / Unsplash Taken with a Canon EOS 600D: 84.0 mm, ƒ/5.0, 1/200s, ISO 100 in Moena, Italy
  • Manual focus

As an alternative to infinity focus you can focus using your camera’s or phone’s Live View. Use your screen to focus on the brightest star, or the one automatically selected by your camera, and center on it. This might be Vega in summer and Sirius in winter. 

Zoom in on that star using the Live View magnifier and adjust the focus using the focusing ring until the star is as small as possible and the entire scene is in focus. Then test to see how sharp your image is and adjust accordingly. Once you’ve found the right setting, turn off Live View and don’t touch your focusing ring again.

Enjoy the show

Once you’ve made your final adjustments, use your remote shutter release or a self-timer to start taking pictures of the Milky Way. And don’t forget to enjoy the starlit spectacle in front of you

Once you have the Milky Way photo you were looking for, you can take shots with different settings to get different results.

Processing your Milky Way photos

To make the most of your Milky Way photos, you might want to retouch and rework them using editing software (Lightroom, Photoshop, etc.). While post processing is not a requirement, it can allow you to correct some defects, enhance the colors, or create original creative montages (by collaging several photos).

In a nutshell, processing a Milky Way photo means:

• Adjusting contrast

• Adjusting brightness

• Adjusting white balance and color saturation

• Eliminating unwelcome artifacts

• Reducing digital noise

Go ahead and play with these options to get great Milky Way photos. For best results, remember to edit your photos in RAW format.

You have now mastered the basic rules of astrophotography. If everything isn’t perfect at your first attempt, don’t get discouraged: the important thing is to practice and experiment until you’re confident and able to anticipate the results. With the right settings and preparation, you will create a stunning Milky Way photo.

*True to its eco-responsible philosophy, MPB website offers its expertise to help you make the best choice in used cameras, while providing a safe platform for buying, selling, and trading photo equipment.

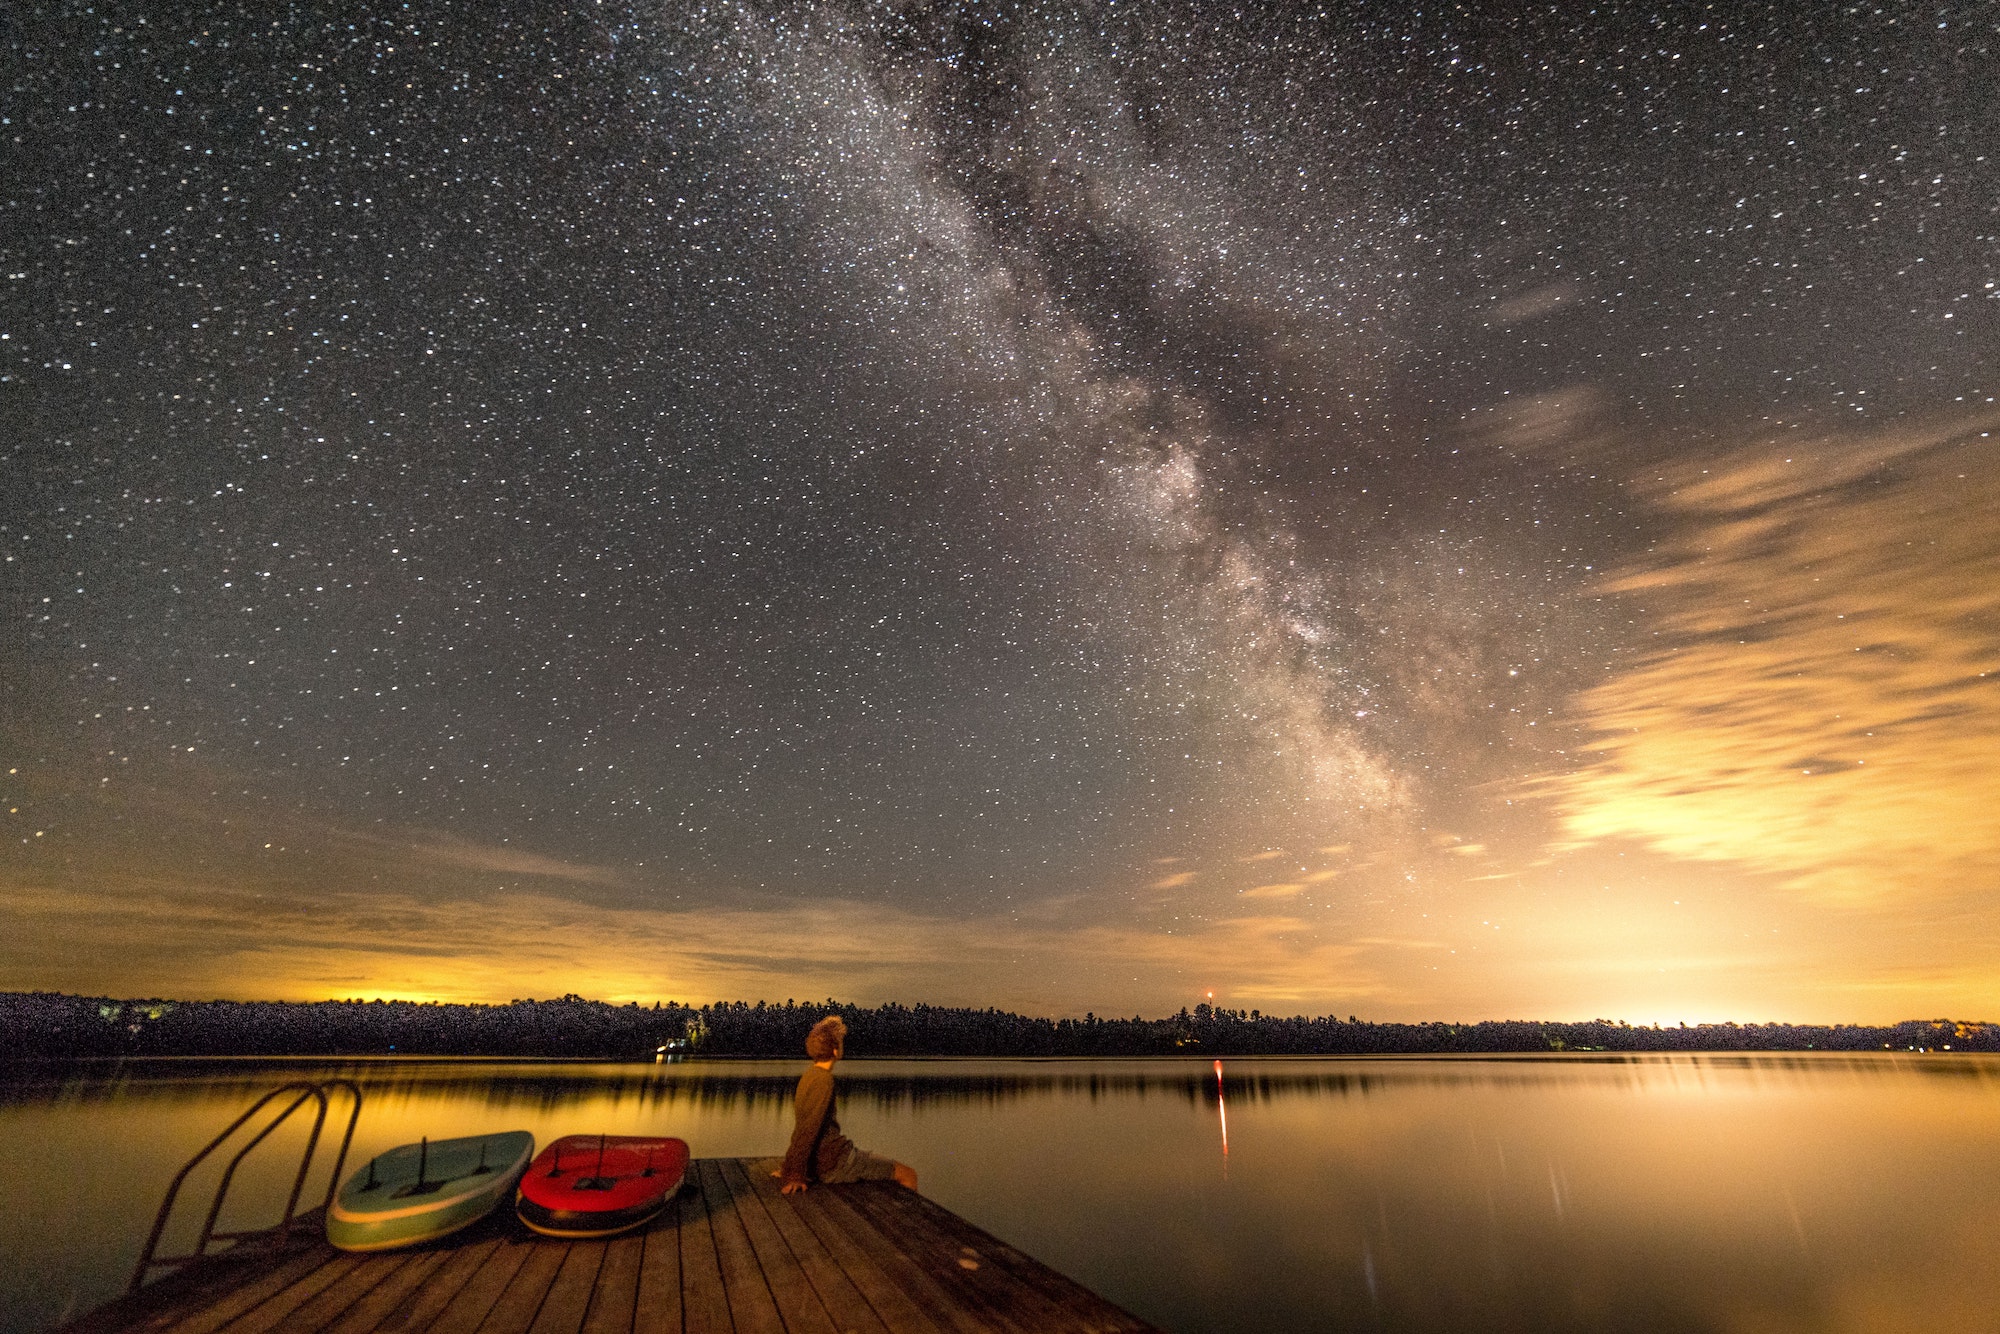
Processing the Milky Way photo can go a long way Credit: Ethan Richardson / Unsplash Taken with a Sony ILCE-7RM2: 30s, ISO 3200 at Big Cedar Lake, Ontario, Canada.
Processing the Milky Way photo can go a long way
© Ethan Richardson / Unsplash
Taken with a Sony ILCE-7RM2: 30s, ISO 3200 at Big Cedar Lake, Ontario, Canada.

Rio’s Greer Museum to host photography exhibition

Rio’s Greer Museum to host photography exhibition
image

RIO GRANDE, Ohio (WV News) — The Greer Museum is hosting an exhibit of the photography work of Ohio Poet Laureate Kari Gunter-Seymour.

Not only celebrated for her poetic prowess, she demonstrates remarkable skill as a photographer, officials said.

Robert Capa Contemporary Photography Center Budapest : Robert Capa, the Photojournalist – The Eye of Photography Magazine

Robert Capa Contemporary Photography Center Budapest : Robert Capa, the Photojournalist – The Eye of Photography Magazine

Robert Capa, the Photojournalist, the world’s first permanent exhibition of Robert Capa’s life’s work, has opened in the new exhibition space of the Robert Capa Contemporary Photography Center in Budapest.

2008

In 2008, the Hungarian State purchased the Master Collection III series of 937 images, making Budapest, alongside New York and Tokyo, the most important custodian of the Capa legacy. The agreement on the purchase of the Robert Capa Collection in Hungary stated that the collection should be housed in its “permanent home”, a photographic center to be established for its research and exhibition.

2013

The Robert Capa Center for Contemporary Photography (Capa Center for short) was established in 2013, with the main task of promoting the purchased collection through exhibitions, events, and publications, as the trustee of the Robert Capa photographs. In addition, in the exhibition space on the first floor, a permanent exhibition of the André Kertész collection from Szigetbecse is on display and in addition regularly changing contemporary photography exhibitions present the artists and trends in Hungarian and international photography. In the event hall, a variety of photographic events (lectures, workshops, portfolio consultations) take place.

2023

On 13 June 2023, the world’s first permanent exhibition of Robert Capa’s life’s work, Robert Capa the photojournalist, opened in the new exhibition space of the 10th anniversary Robert Capa Contemporary Photography Center.

The unique exhibition presents about 138 photographs from the series, including many that have become iconic, and explores the major stages of the photographer’s life, arranged according to the themes defined by the oeuvre. Robert Capa’s work is important because of the profound impact his images and attitude have had on the public, forever changing the norms of photojournalism, and contributing to the understanding and remembrance of history.

Robert Capa lived only 41 years. Born Endre Friedmann in Budapest on October 22nd 1913, he died on a landmine in the Indochina War 1954 on May 25th.

His name is among the first and best in the history of photography. The war correspondent, who had seen five battlefields, made his mark in his tragically short life: his photographs of the front and the rear created a school and renewed photojournalism. He photographed the war, the fighting, the soldiers in the trenches and the everyday life of the hinterland from the position of a participant observer, with boundless compassion. He was there with the soldiers; he was in the middle of the action and he documented the events in the immediate vicinity of death. It was this proximity, this participation, that recreated the genre of war photography. As his famous quote goes: “If your pictures are not good enough, you were not close enough”.

Robert Capa had a major impact on the photojournalism profession and war photography. His images and work have inspired and continue to inspire generations. The ethical principles and dedication that Capa embodied have remained important pillars of the photojournalism profession ever since.

Robert Capa Contemporary Photography Center
Budapest, Nagymező u. 8,
1065 Hungary
https://robertcapaexhibition.capacenter.hu/en/